How To Group Affiliates in Rakuten Affiliate Network

As an affiliate manager, do you group affiliates or do they all reside in one single cohort (unassigned)? Many program managers do not group their affiliates, but they should be. Do you send all affiliates the same message all the time? I sure hope not. By grouping affiliates, it allows you (as the affiliate manager) to target specific group of affiliates with special promos, exclusive deals, activation incentives, etc. In this post, I will outline how to group affiliates on the Rakuten Affiliate Network.

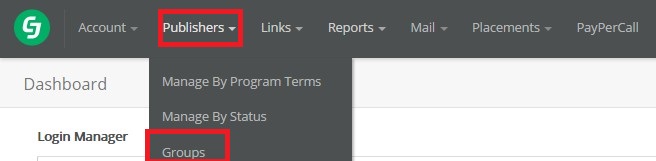
The first step is to log in to your Rakuten Affiliate Network merchant account. Next, hover over the “Publishers” tab and click “Publisher Groups”.

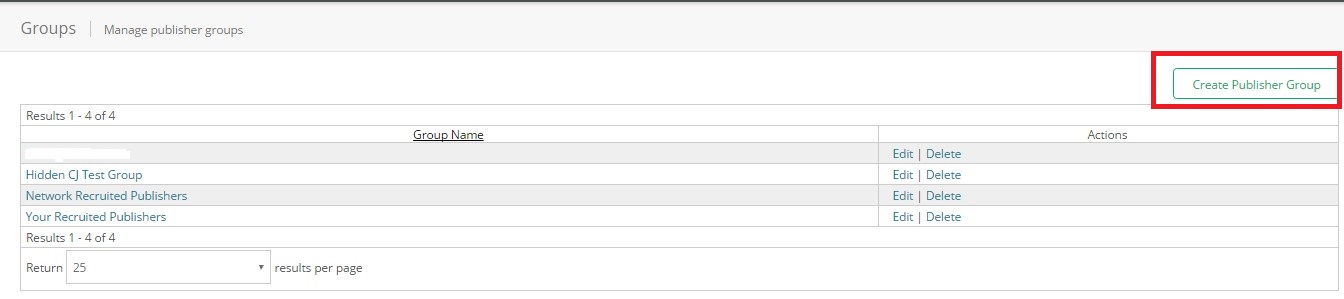
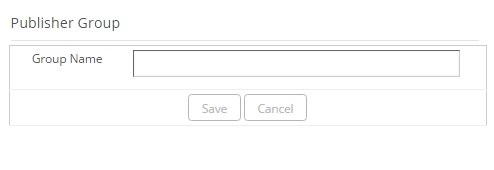
From there, simply input the group name and click “Add”. This will create the group and it will be shown with the rest of your available groups (if you have any). By default, RAN adds all publishers to the “Unassigned” group until you move them.

ls-1

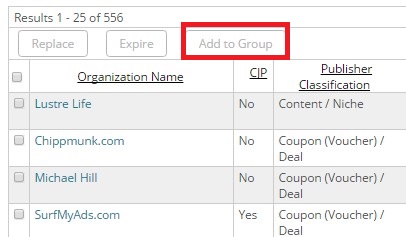
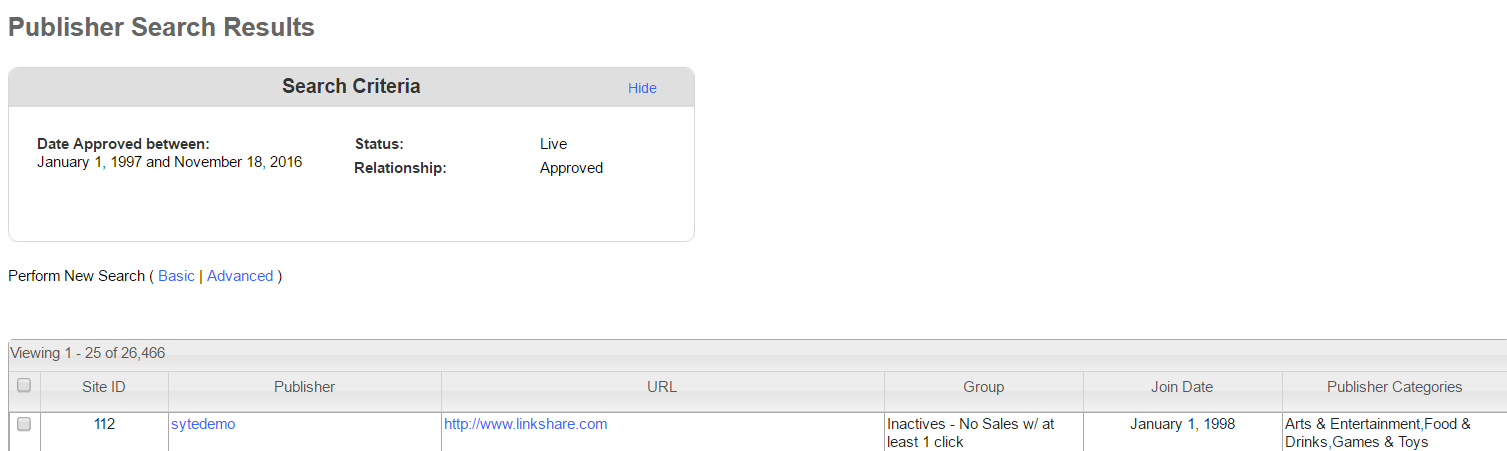
Next step is to select the publishers you want to move to the newly created group. You will want to go to hover over the “Publishers” tab and click “My Publishers”. You can filter your current affiliates in various ways, but if you want to see the complete list just click “Search” (do not apply any filters). After all your affiliates are listed check the box in the left column of the ones you want to move to the new group. After the box is checked, scroll to the bottom of the page and click the “Move to Group” button and it will give you a drop-down menu to choose the “Selected” affiliates or “All matches”, you will click “Selected”.

linkshare-publisher-search-results

linkshare-publisher-search-results-2

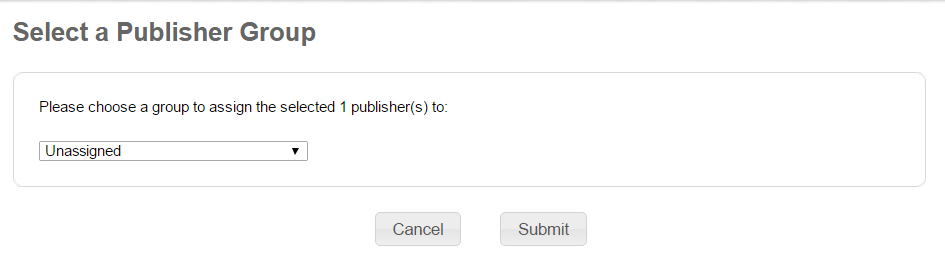
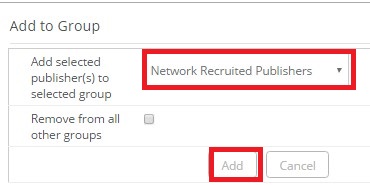
The final step is to choose the group to move the selected affiliates to. The newly created group will be available in the drop-down menu, select it and hit submit. You will get a success message and that is it, you created and moved affiliates to groups.

linkshare-select-a-publisher-group-3

linkshare-publisher-search-results-4

Creating Publisher Groups in CJ Affiliate Network

Do you have trouble communicating with your affiliates? Do you have messages for different types of affiliates? Are you unsure of how to send different messages to different affiliates? If you answered yes to any of the three questions I am here to help. I have seen it numerous times when we take over management of affiliate programs for clients and their affiliate database is a complete mess, but it doesn’t have to be. If you are a merchant with your affiliate program on CJ Affiliate I am going to show you how to create groups for your affiliates and how to put them in the appropriate group(s). After you read this article you will have one of the most organized affiliate databases out there.

Step # 1 – Go to “Groups” tab

CJ 1

After you are logged in to your CJ Affiliate account click the “Publishers” tab and then click the “Groups” tab. This will take you to the page where you will create groups to place your affiliates in.

Step # 2 – Create Affiliate Group

There will be groups already created, but they were done so by CJ Affiliate. To create a new group click the “Create Publisher Group” button to the far right of the screen. A pop-up box will appear next.

CJ 2

Step # 3 – Name your new publisher group

This is where you name the group. You want to be as clear as possible so in the future you know exactly who is in the group. Once you complete inputting the name click “Save”. Your new group has been created and the next step is filling it with affiliates.

CJ 3

Step # 4 – Add affiliate to a group

Go to your affiliate list (through “Publishers” – Manage by Program Terms”) and check affiliates that you want to include in your newly created group and then click “Add to Group”.

CJ 4

After you click “Add to Group” a pop-up window will appear and you will select the group to place the affiliate in from the drop down box. After the group is selected click “Add” and then you are finished.

CJ 5

That is it. Instead of sending all your affiliates the same message, this functionality allows you to now segment message to specific affiliates. You may have a bonus opportunity for content affiliates, but do not want coupon/deal affiliates to see this, so having groups set up will allow you to send to the audience you want.

How to View ShareASale Newsletter Performance Reports

Your affiliate newsletter has been sent to your affiliates, but how to you find out who is opening it? It is important to analyze such things as the open rate, bounce rate, and the individual affiliates that are reading the newsletter. I will provide a step-by-step guide to finding and reading your affiliate newsletter performance reports.

Step 1 – Locate and Click on the “Send Newsletter” Icon

Once logged in you will need to hover over the “Affiliates” tab and click the “Send Newsletter” icon.

Sas 2

Step 2 – Click on the “Full Archive Page” Link

After you click on the “Send Newsletter” icon you will need to scroll down and click the “Full Archive Page” link. The link will take you to a page where it will show you all your previous newsletters sent.

Sas 3

Step 3 – Choose “Report” from Newsletter Archive

This section will show you every single newsletter sent along with other pertinent information including: newsletter ID, the send date, how many affiliate it was sent to, the option to view the newsletter, and report. For the purpose of this post we are going to click on “Report”.

SaS 4

Step 4  – Review Data for Specific Newsletters

Here is the data for each newsletter you chose. The rectangle box at the top will have the entire selection of available newsletters that have performance data. I removed all the sensitive information from the image, but you should see a few choices (if you have sent them in the past).

The information provided below provides exact numbers of opens, the open percentage, bounces, the bounce percentage, and the individual affiliates that opened the newsletter. To find out who the affiliates are that opened it simply click the “plus sign” (red square).

SaS 5

Why are affiliate newsletter open rates and bounce rates important? They help in determining the best method to communicate with affiliates as well as the best times and days. The bounce rate could be a combination of invalid email addresses, mailboxes full, etc. To determine the best day and time to send affiliate newsletters we recommend A/B testing. Send a newsletter out on different days of the week, at different times, with different subject lines. Once you have completed the tests, simply review the data, learning from your successes, and constantly refining how you handle your future mailings.


How To Create and Send ShareASale Affiliate Newsletters

Affiliate newsletters are an important component in managing relationship with your affiliates. Communicating with your affiliates is extremely important to keeping them engaged and active. Newsletters should have a personal touch and provide affiliates with information they can use to further promote your products. In January I wrote a post on writing effective newsletters, but today I am going to show you how to send a newsletter through the ShareASale interface. I will provide a step-by-step guide to this very important, but sometimes overlooked piece.

Step 1 – Locate the “Send Newsletter” Icon

After you log in to your ShareASale merchant account, hover over the “Affiliates” tab and you will see a “Send Newsletter” icon (looks like a stack of newspapers). Click the “Send Newsletter” icon.

Blog Post 1

Step 2 – Choose the Format You Want to Send the Newsletter In

You have three (3) options on how to send the newsletter to your affiliates:

  1. Text
  2. HTML
  3. Split Campaign.

When I send newsletters out for clients I use the HTML option because it allows me to create a robust newsletter with images and clickable links. The split campaign option is available when you want to maximize your open rate.

Blog Post 2

Step 3 – Determine the Recipients of the Newsletter

By default is provides a list of ALL affiliates to send to, but if you do not want to send it to all affiliates ShareASale allows you to search affiliates in many ways including: groups, tags, commissions earned, clicks, country they reside in, or even past newsletter recipients. Once you determine who is getting the newsletter you will see them in the recipients section to the right.

Blog Pst 3

Step 4 – Compose your Newsletter

This is the section where you actually compose your newsletter. For this articles purpose I have chosen the HTML format. You must enter a compelling subject line (you want affiliates to open it) and the body of the newsletter. ShareASale offers ways to customize and personalize newsletter using Macros. You can insert a Macro and have the affiliates name automatically populate when it is sent to them and also include specific creatives that will embed the affiliates ID automatically.

Blog Post 4

Step 5 – Preview your Newsletter

Once the subject line and body of the affiliate newsletter are complete you can preview it and make sure it is formatted the way you want and it is mistake free. In this step you can send a test to yourself to make sure all is good.

Blog Post 5

Step 6 – Finalize the Newsletter and Prepare to Send

This is the final step before the newsletter is sent to your affiliates. To the right you will see a summary that will include any items that need your attention. The ones that require your attention will be in red. Here you will choose a From/Reply-to address and the delivery date and time. You have the option to schedule it, but not for a specific time, only certain times during the day. Please note that Friday’s are not a recommended day to send newsletters.

Blog Post 6

There you have it, a guide to sending an affiliate newsletter through ShareASale. Like many of the other tasks in ShareASale it is straight forward. Next week I will show you how to locate affiliate newsletter open rate information.