How to View and Download ShareASale Performance Reports

In last week’s post I showed you how to access and pull affiliate performance reports on CJ Affiliate By Conversant. This week’s post will be on the same topic, but explore reports on ShareASale. After reading this you will have an understanding of the three (3) types of reports to focus on and what they contain. So without further ado, a step by step guide (with images) on how to pull affiliate program and affiliate performance reports from ShareASale.

Step 1 – Hover over the Reports Tab

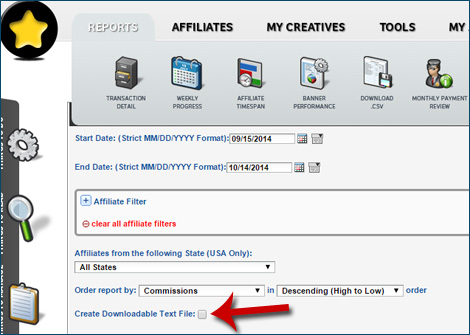
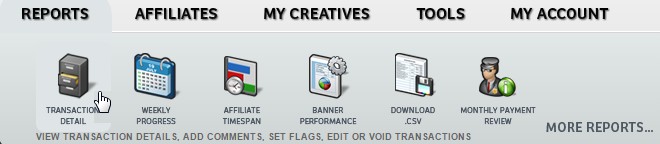
Once you login to your merchant account you will see a navigation bar with 5 tabs including: Reports, Affiliates, My Creatives, Tools, and My Account. To access the affiliate reports you need to hover your mouse over Reports. You will see many options, but the three reports we will focus on are 1. Weekly Progress 2. Affiliate Timespan 3. Banner Performance.

ScreenHunter_409 Jan. 29 10.19

Step 2 – Click Weekly Progress

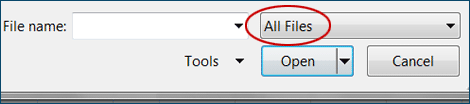
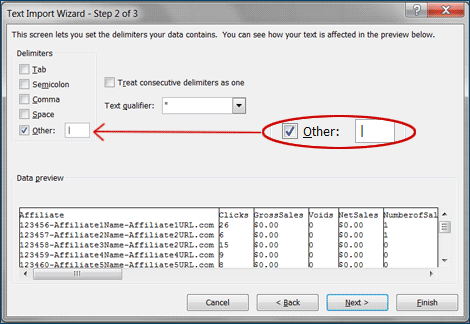
This report gives you a snapshot of the previous two (2) weeks performance broken down daily. You have the option to adjust the start date of the report, length of the report, number of weeks to display, and have it converted into a downloadable CSV file. However, I recommend opening the CSV files using Excel. Here is a post that shows you how to open a pipe-delimited file.

Weekly Progress # 1

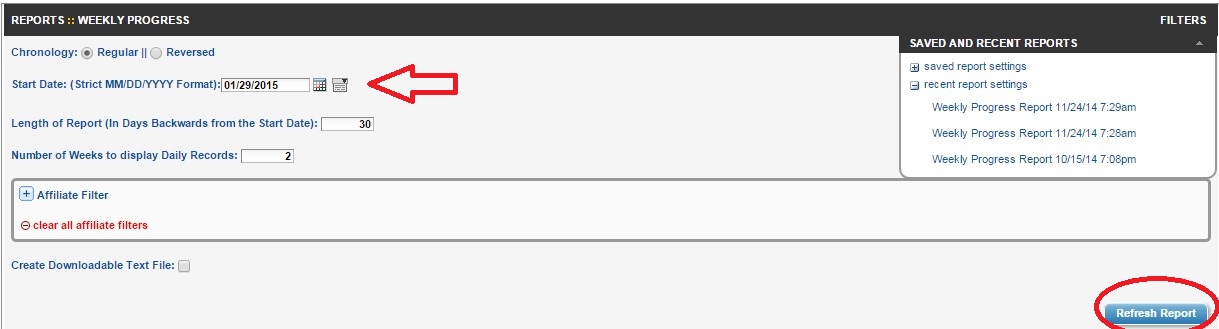
The contents of the report include: clicks, gross sales, number of sales, net sales, voids, commission, number of affiliates in program, and number of active affiliates.

SaS Weekly Progress Report

Step 3 – Affiliate Timespan Report

You must hover over the Reports tab and click Affiliate Timespan. This report is similar to the weekly progress report except it provides each affiliate and the number of clicks and sales they generated for a specific time period.  You can customize the report dates, target individual affiliates and download the entire report in a handy CSV file.

Affiliate TimeSpan # 1

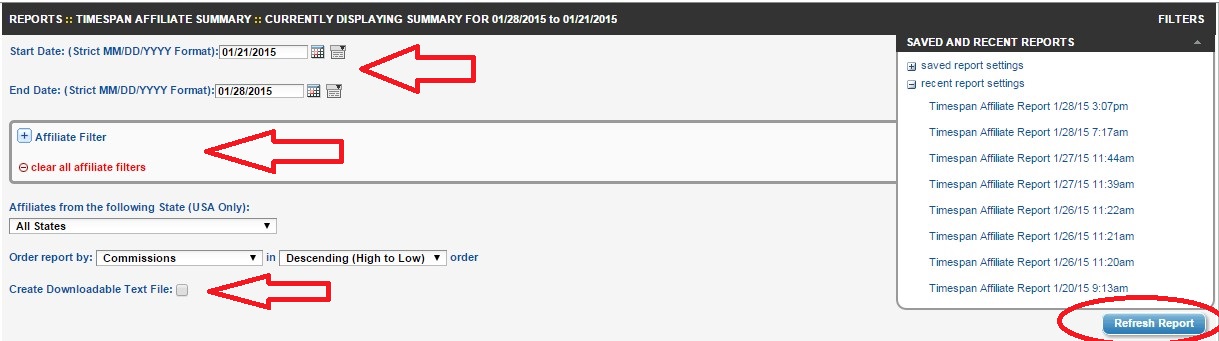
The contents of the report include: The affiliate ID and main URL, clicks generated, sales, commissions earned, EPC (Earnings Per 100 Clicks),  and average order value.

Affiliate TimeSpan # 2

 Step 4 – Banner Performance Report

Again, hover your mouse over the Reports tab and select Banner Performance Report. This report gives you vital statistics on the performance of your creatives (banners and text links). You can customize the reporting period to view, view only specific kinds of creatives (i.e. banners) and download it in a CSV file.

Banner Performance #1

The contents of the Banner Performance Report are:  banner id (click on it and it will show you the exact banner/text link), type, the amount of sales it generated along with dollar amount.

Banner Report # 2

As an affiliate manager that manages multiple accounts these reports touched upon are extremely important to review daily and weekly. They provide you current trends, top performing affiliates, and top performing creatives. They provide you all most of the information you will need to effectively manage your ShareASale affiliate program on a day-to-day basis.

How To Guide to Starting an Affiliate Program on ShareASale

You are ready to start an affiliate program and have decided to use ShareASale as your affiliate network, but now what? Setting up an affiliate program can be a daunting task, but let me show you a step-by-step approach to successfully set-up an affiliate program on ShareASale. In total there are 8 steps and I will describe what needs to be completed within each step.

Step 1 –Commission Rates and Program Description

This is where you determine your default commission rate per sale and/or lead. It can be entered as a percent or dollar amount (make sure the correct radio button is marked). If you are going to be doing a two-tiered commission structure this is also where you enter that information.

The program description should describe your product or service, the commission being offered and any other enticing details that will get affiliates to join. Along with the program description you should create your program agreement. This document will lay the ground rules for affiliates to follow while promoting your product/service.  It should include SEM restrictions, coupon policy, and other restrictions affiliates should be aware of. Finally, make sure to add your logo here. It should be no larger than 300 pixels wide and 200 pixels high.

Step 2 – Administrative Options

This step is where you have the options to control the behaviors of your affiliate program. Tasks to be completed include:

Setting the auto-approve affiliate option -we recommend reviewing each application individually.

Reply email text – this is the message that gets sent to potential affiliates when they apply to your program. It generally includes a short message informing them that their application is being reviewed and decision will be made within 24 hours and if there are any questions to reach out.

Email notifications (when affiliates join your program) – not necessary, but you can select “yes” to make sure you are reviewing each application as they come in.

Low balance notification – we recommend getting notified, just in case!

Balance threshold notification – you get an email notification when your balance hits the threshold entered here.

Email when a sale/lead takes place – This is totally up to you, but it could just be filling up your inbox. You can see all new transactions upon logging into the main interface of your program.

Tracking Cookie – How long do you want the time to be between the original click through and the sale? 60 days is their default, but you can select whatever one makes sense for your business.

Step 3 – Choose a Program Category

In order for affiliates to find your program you need to select a category. There are almost 40 categories to choose from (they only let you choose 1), so make sure you select one that relates to your business. You also add keywords here for affiliates to use when searching through ShareASale for merchants to partner with.

Step 4 – Place Tracking Pixel

We are getting closer to launch now. This is the most important step of the process because the pixel you will be installing on your site will be tracking all affiliate activity and will be the tracking mechanism for your program (clicks, sales, etc.). We recommend having a person with an IT background install to ensure it is done properly.

Step 5 – Testing the System

Once the tracking pixel is installed you must make sure it is working properly. What happens here is you do a test purchase to make sure the pixel is firing when necessary and all the information is being collected by ShareASale.  The transaction completed will be voided before the program goes live.

Step 6 – Funding the Account

General rule of thumb here is to deposit a minimum of $100 to start. Once the program is live you can set up the auto deposit feature (highly recommended) and deposit more money if you desire to cover sales that may come in initially.

Step 7 – Upload Creatives

In this case “creatives” mean your banners and text links. Depending on how many banners you have created there is an option for a mass upload as opposed to doing it one by one.  If you are not sure what banners to include check out this article that will provide more clarity.

Step 8 – Request Activation

This is final step. Once steps 1 -7 are complete you can request your affiliate program go live to ShareASale. Once activation is requested it may take 24-48 hours to go live. ShareASale checks everything again on their end to ensure you are 100% ready to start running an affiliate program

There you have it, a guide to starting an affiliate program on ShareASale. Follow the steps carefully and you will have a live affiliate program. Now it is time to start recruiting and making money.

How to View ShareASale Pipe-Delimited File in Excel Columns

“Pipe” symbol is a vertical bar as in | or ¦ but more frequently the former.

A “pipe-delimited file” is a file in which each line of represents a record, and separate fields are divided by the pipe. This symbol then serves as a delimiter (or an indication of “the beginning or end of a data item”).

The most common format in which delimiter-separated files are saved is CSV. It may seem a bit strange as “CSV” originally stood for “comma-separated values” but don’t let the file extension’s semantics confuse you here. It is very common that, instead of commas, colons or pipes are used as delimiters.

One of the main reasons why CSV files are widely-used online is because “plain-text makes the data easy to import into any Spreadsheet program or database regardless of what type of computer or software program you are using” [source].

“Easy to import” they say, huh?

However, the reality is that those of us who aren’t too technically savvy, may find the conversion of a CSV file into a digestible Excel format a challenging task… especially when you have to deal with a pipe-delimited original. Don’t despair! It is actually very easy to convert a pipe-delimited CSV into an Microsoft Excel file with columns. Excel will, actually, do all the “magic” for you!

For my example I will use an “Affiliate Timespan” ShareASale report.

Step 1: Generate Pipe-delimited File

If you already have the CSV file you wish to convert into Excel columns, just skip right to the next step.

If you’re doing this on ShareASale, log into your merchant interface, then go to Reports > Affiliate Timespan, and check the box next to “Create Downloadable Text File” (see the image below).

ShareASale Affiliate Timespan Report

Step 2: Open File in Excel

Launch Microsoft Excel, go to File > Open > change “All Excel Files” (to the right of the “File name”) to “All Files,” and find the pipe-delimited file you have just downloaded.

Excel Open All Files

Hit “Open” and Excel’s “Text Import Wizard” will launch.

Step 3: Help Excel to Convert It for You

Keep the 1st step of the Wizard as is (having “Delimited” checked as it is a delimited file that you are working with),  and click “Next.”

But in the 2nd step, pick “Other” and insert the pipe symbol into the blank box to the right of your choice (as shown below). As soon as you do so: Voilà! The preview will already show you the columns you are looking for.

Pipe-Delimited File to Excel Columns

Just click “Finish” and you are all done, and ready to save this file in the format you’ll be able to enjoy a bit better than the original CSV file.