Rebranding and Affiliate Program: Concerns and Best Practices

RebrandingAre you thinking of rebranding while having an affiliate program up and running? Then I should warn you that it can be complicated, risky, costly, and should only be considered for the right reasons.

As Dawson from Hubspot emphasizes, rebranding is not a solution for low sales, boredom, or unsuccessful brand awareness efforts. It also won’t help new managers stand out or companies in crises cover everything up.

Such problems could be solved with a new, better marketing strategy. When something doesn’t work the way you want it to, don’t destroy everything to start from scratch!

You’ve invested time, effort, and money to reach the point where you are now. Instead of throwing everything away, salvage what you can and build on it. Changing the brand name, logo, or colors, won’t always solve your problems. Identifying past mistakes and learning from them might.

When is Rebranding Favorable for an Affiliate Program?

You should only consider rebranding if your company’s mission, vision, and values have changed. It may help if you’re tapping into new markets to which your current logo and other brand elements are not relevant, or if you’re trying to reposition your brand on the market. Expanding offers and mergers and acquisitions may justify rebranding as well.

If you decide to go through with it, don’t rush! Take some time to plan and prepare everything, to make sure you do it right. The process is much more complicated when running an affiliate program. You need to protect your reputation not just in front of customers but also in front of affiliates.

On one hand, you want to hold on to any shred of brand awareness and reputation you’ve already built. On the other hand, you want your new company image and actions to inspire confidence and professionalism to both customers and affiliates.

Rebranding means more than a new logo. It means a long stream of changes that need to be implemented consistently and strategically, not just by you as the merchant, but also by your partners and your affiliates.

Things get even more challenging when physical products are involved. Compared with digital products or services, where most of the changes have to be implemented online, rebranding physical products affects labels, packaging, stocks, and more.

Here are the most important three aspects to consider when planning everything so as to minimize the negative impact on your affiliate program.

Key Rebranding Aspects & Impact on the Affiliate Program

1. Brand and Products Presentation

Depending on your line of business, you use your logo, motto, and your brand colors everywhere. They’re on your website, product labels, tags, and packaging, product guides, and instruction manuals.

They’re also part of your affiliate network merchant profile. Your affiliates and wholesale, retail, and dropshipping partners use them as well. Perhaps you’ve also spent a fortune on commercials and traditional marketing materials and campaigns.

Before you spread the word about your rebranding plans or implement any changes, it is important to have everything covered, to act consistently. When you get to it, anyone looking up your brand should see the same elements everywhere. Otherwise, your brand image, company reputation, website conversion, sales, and affiliate program statistics will pay the price.

2. Affiliate Program Creatives

Many merchants running affiliate programs ignore the importance of creatives. Don’t follow their lead! Instead, notify affiliates in advance of your plans and make sure that, when the time comes, they have new banners, product and lifestyle images, videos, etc., all in line with your new branding strategy.

If they do not, the gap between what potential buyers see on your affiliates’ sites and what they see on your website or receive from you after ordering could negatively affect your website’s conversion rate and, with it, the performance of your affiliate program.

Low conversion means fewer sales, lower affiliate payouts, and low EPC, which is the primary criteria affiliates use to determine which merchants to promote. All these affect affiliate program statistics, which, in turn, have a snowball effect on overall business performance.

They can be avoided if you remember to provide your affiliates with new, high-quality creatives in time for them to line up with your rebranding process. If you play your cards right, they may even help you spread the word. They could easily announce your plans in blog posts, newsletters, or on social media.

3. Product Samples

Many merchants running more or less successful affiliate programs do not realize it but rebranding brings about the need to send new products or samples to reviewers and influencers.

If you changed the labels and/or the packaging, the available video reviews and photos are no longer an accurate representation of your products and/or services. They create false expectations (of a certain label, packaging, etc.).

Therefore, you will have to send products with the new labels and packaging to affiliates. This way, you enable them to create new reviews or update their existing ones.

That could add up to the already steep rebranding costs. However, it’s a necessary step and does bring about some benefits. You’ll get more backlinks, more search results, and more attention.

Some reviews are surely old, forgotten, buried under more recent reviews of competing products. Some affiliates have probably refined their strategies and are much better at highlighting product strengths and convincing their audience to buy.

It may help to begin with top reviewers and expand to the rest gradually. If you have high-quality creatives and a knowledgeable and dedicated affiliate program manager, they should be able to help. They can reach out to affiliates, send them the new creatives, and ask them to update their promotions accordingly.

4. Merchant Website Changes & Affiliate Program Links

The changes you decide to implement as part of your rebranding process will, undoubtedly, be reflected on your website. It’s maybe the last thing on your mind, but if it will result in website downtime or if the domain name or product URLs are going to change, you need to do something about it.

If you already know when it’s happening and how long it may take, it helps to notify affiliates. Rather than abandoning your old domain, setting up a new one, and expecting all your affiliates to update their links immediately, set up redirects and update links and banners on your end.

Not doing it means closing your door on affiliate traffic. The broken links will result in warnings to affiliates, poor experience for the traffic they send your way (which could be redirected to your new website), lost sales, and, implicitly, lost commissions.

All these can be avoided, so see to it. If you do not succeed, then acknowledge, apologize, and act! This post on How to Remedy Downtimes in Affiliate Tracking explains everything you need to know and do.

Unsuccessful Rebranding Through Customers’ Eyes

Imagine that you’re the buyer and you find out about a great line of products on an affiliate website, from ads, or on social media. You want to know more, and you google them. You get a lot of results but, instead of each result reinforcing the idea that you’ll get great value for your money, you get confused.

The same brand name appears with different logos, in different colors. Some retail websites show generic, specifications-focused product names that do not resemble anything on the merchant website.

You check video reviews, and you find some linking to retailers and others linking to the merchant website. Some feature products with a blue label, others feature products with an orange label. You click links supposed to take you to the merchant’s website but end up with a 404 message.

As you move from one website to the next and from one page to another, you notice the brand name is spelled differently. Perhaps you can even find different spelling variations on the same website.

Do you risk ordering if you’re not sure which product you are going to receive? Let’s say you do order and receive a product that’s labeled and packed differently from what you saw online. Even if you don’t return it, your experience is anything but rewarding.

And just because one person decides to buy, it doesn’t mean all your target customers will do the same. How can you avoid such issues and make sure that your rebranding efforts pay off? Pay attention to the aspects discussed above and follow the tips below!

10 Rebranding Tips for Merchants Running an Affiliate Program

1. Learn from the Best

No matter your line of business, you should be able to find at least one competitor or related merchant who went through a rebranding. Analyze their reasons and evolution. Identify their strengths and weaknesses, so as to leverage the former and avoid the latter when the time comes.

Believe it or not, your partners and affiliates can be of tremendous help here. Chances are some of them went through rebranding themselves. Others have surely witnessed the process implemented by various merchants they work with. They can share their experience, provide feedback, and advice.

At AM Navigator, we helped quite a few of our clients rebrand while managing their affiliate programs. It’s not easy but it’s not impossible either, especially when you learn from other people’s success and mistakes, when you plan and implement everything strategically, paying attention to details.

2. Get Everyone Within the Company Involved

While the decision may be yours alone, as explained above, it impacts most if not all the departments of your business. Therefore, make sure you discuss it with your team, including your affiliate program manager.

This way, they will know what to expect, what their responsibilities are, and they will be able to help. Your rebranding efforts will be much more likely to succeed if they are supported by everyone else, from accounting to marketing,  customer service, logistics, and affiliates.

3. Budget Carefully

Rebranding brings about considerable costs: new logo, website, marketing materials, and packaging designs, new product photoshoots and video commercials, extensive marketing campaigns, new label products for affiliates to review and feature, etc.

Once you get the ball rolling, you cannot stop it because you’ve exceeded the allocated budget. Therefore, make sure you’re aware of the costs and able to cover them. The members of your different teams can help you assess needs and costs for their particular departments.

4. Consider Trademark and SEO

If you’re going to change your brand name or how you spell it, it is important to make sure that the new name can be registered as a trademark and protected. The last thing you want is to neglect that and leave your brand name at the mercy of trademark violators.

It can severely harm your reputation, cause additional costs, and negatively affect the affiliate program. You can expect deceitful advertising, increased PPC costs, and valuable affiliates turning your back on you.

Another aspect to consider when choosing the new brand name is SEO. You want to research keywords that would be relevant for your products or services, for your line of business, and optimize your website to rank among the first ones in search results for the respective keywords.

5. Strive to Get a Great Logo

The logo is usually the first thing that changes during rebranding. Many merchants see it as a shortened version of their name and only worry about whether it matches brand colors and looks good on the website, labels, and packaging.

Ideally, the logo should be able to tell your target customers who you are and what you’re selling without requiring further explanations. Many of your affiliates, especially those focusing on savings and rewards, will only display your logo on their website.

If visitors don’t recognize it and can’t tell what you’re selling from it, chances are they will not click it, so they won’t find out about your offers, visit your website, or buy from you.

6. Announce Your Rebranding Through Stock-Clearance Sales

Especially if you have a large product inventory, you want to get rid of old label products and packaging and make room for new ones. It’s never a good idea to send your customers products that differ from what they see on the website.

An excellent way to avoid that and ensure the success of your rebranding efforts is to organize a sale. It goes without saying that your affiliates, especially reviewers, influencers, and content affiliates, should be included.

Work closely with your affiliate program manager to make sure they receive timely notice of the sale and of its purpose. The discounts will help you sell faster, increase your website conversion rate, and improve affiliate program statistics, including EPC.

When the time comes to send your affiliates new products to review, they won’t refuse. Moreover, the sale is an excellent way to announce your new goals, values, and mission.

7. Work with Your Partners to Implement Changes in Sync

When you rebrand, you want to do it at the same time everywhere: on your own website, on your resellers’ websites, on any third-party directories, etc. It doesn’t help anyone if you change the logo and images on your merchant website but resellers and affiliates keep promoting the old ones.

On the contrary, it will create confusion, false expectations, and burden your customer service department with questions to answer, refund requests to process, and unsatisfied customer feedback to mitigate.

8. Be Consistent

Once you’ve started on the rebranding path, there is no going back. Don’t switch between logos or start another rebranding process. It suggests that you don’t know what you’re doing and you cannot be trusted.

With the right marketing strategy, any logo and brand name can be made popular but, once ruined, a merchant’s reputation is difficult to rebuild. Your customers, partners, and affiliates need to know that you’re responsible, reliable, and you know what you’re doing.

9. Be Coherent, Within and Outside the Affiliate Program

As you go through the rebranding process, a lot of changes will be required, from the website content to the affiliate program description. It is very important to make sure that every single image, every video, every banner, and every single piece of content on your website and within your affiliate program reflects your new brand elements.

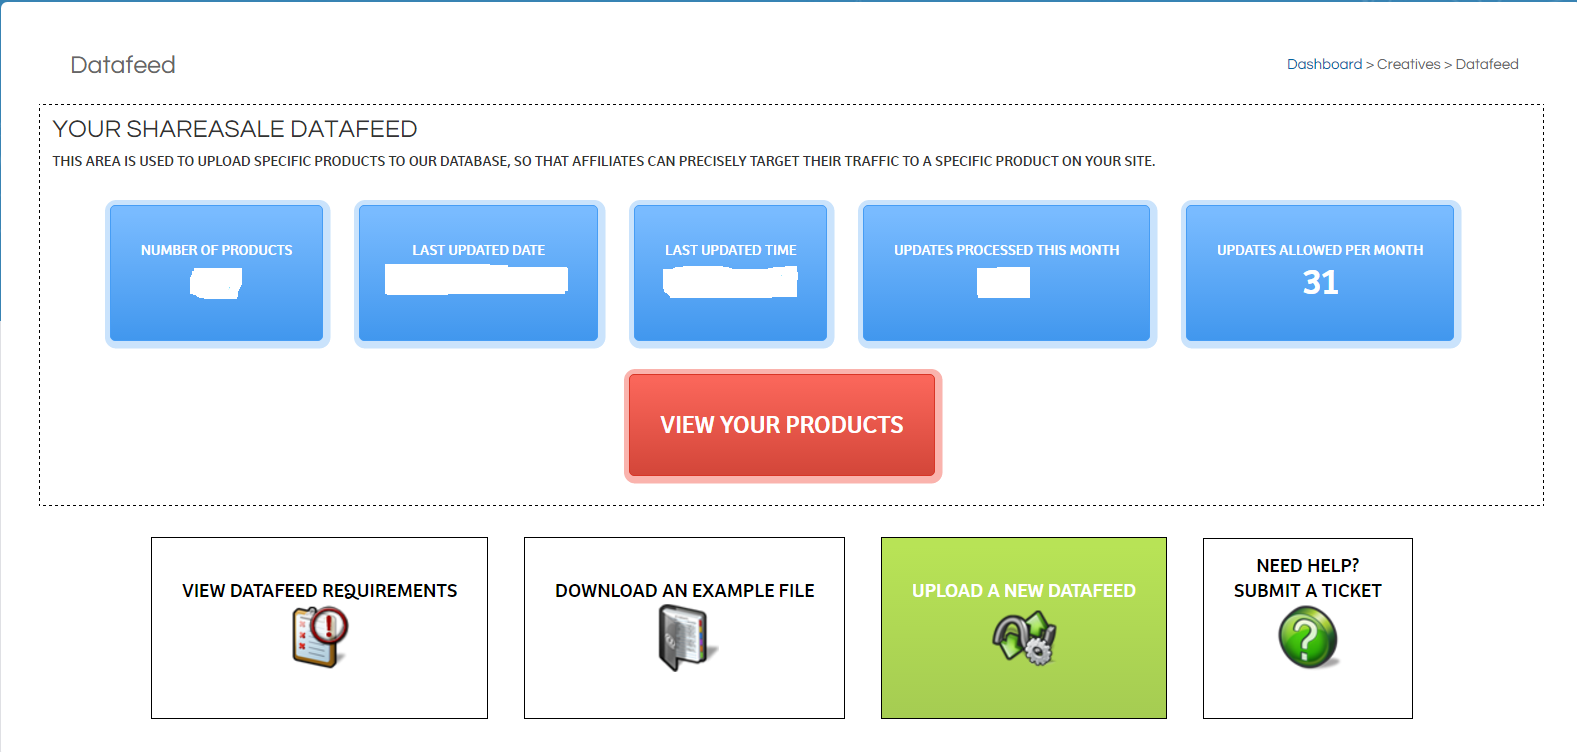
So take some time to review and adjust everything.  Sometimes, it can be as easy as using Ctrl+F to find different spellings of your brand name and updating affiliate banners within your affiliate network to make sure the changes will be reflected everywhere.

10. Announce Your Rebranding Outside the Affiliate Program

There’s no such thing as too much publicity. Don’t hesitate to announce your rebranding campaign and promote your new brand elements whenever and wherever possible: paid ads, commercials, truck side advertising, affiliate recruitment campaigns, giveaways, newsletter blasts, contests, etc.

It is important to help you and your partners’ audience associate everything that was positive about your brand with the new image you are trying to build. You want to leverage any amount of brand awareness and build on it, and marketing can certainly help with that.

The more popular your brand is, the easier it will be for your affiliates to promote it to their audiences and drive traffic and sales. And if you work together, at the end of the day, you will get what you want: sales for you, commissions for your affiliates, and great statistics for your affiliate program!

How to Audit Your Affiliate Program for a Fresh Start to 2019

Whether you have been running an affiliate program for over a decade or just a few months, it is always great to audit your affiliate program to find out where you can improve.

Here are a few areas to audit your program.

General

First, you want to look at very general items, such as, is there a description of your affiliate program on your website? If so, is there a link to the affiliate program description page?

The other areas that we consider to be general include having a competitive compensation and sufficient locking period. We have written about how to determine what your affiliate commission structure should be, so we won’t go into depth here in this post.

Policies

This is an important part of the audit that is overlooked in many cases. This is where you will want to outline to your affiliates what they can and cannot do within your affiliate program. This includes (but not limited to):

  • FTC Disclosure
  • Trademarks
  • Coupon Codes
  • Paid Search
  • Domain Names
  • Rules for Loyalty / Incentive Affiliates
  • Rules on Self Referrals
  • Toolbar, Software, and Adware Rules
  • Brand Positioning
  • And more

The reason this section is so important is because these are the rules of your program. If you need to remove someone from your program or even remove commissions, these are the rules that lay out why that may occur.

Creatives

It goes without saying that creatives (banners or texts) are an important aspect of any affiliate program. Ensuring that you have the right size banners, the right call-to-actions, banners that convert and also a diversity of banners are all items to review during your audit.

As with the affiliate compensation part, we have written about affiliate banners and creatives in the past, so you can check out those posts for more in-depth recommendations.

Landing Pages

This portion of your affiliate audit should be done for an overall e-commerce level. It is important to have landing pages that convert. If your landing pages are not converting, then affiliates are not going to promote your offers.

affiliate marketing landing page leak

From an affiliate marketing standpoint, it is crucial that your landing pages do not have any leaks. What do I mean by leaks? A landing page leak would be something that allows the customer to order without the affiliate earning a commission. This could be a phone number within a call-to-action, for example, “Call now to get 10% off”. Also, if there are additional clicks and websites that a customer must go through in order to make a purchase, this could also end up in the affiliate not earning a commission.

Recruitment

Now it’s time to audit your recruitment efforts. These efforts would be broken down into two components, active and passive.

Passive affiliate recruitment is where an affiliate will find you, as opposed to active recruitment, which is where you reach out to an affiliate.

When auditing your passive recruitment efforts, it’s great to start with your in-network program description. Do you have the right amount of keywords and ad copy to entice affiliates to join your program. Find out what keywords your competitors are using within their in-network search and utilize ones that would benefit you as well.

To audit your active recruiting efforts, take a look at your outreach numbers. Are people opening your emails? If yes, are they taking action to the call-to-action within your emails? If not, then it might be time to update your outreach copy.

Audit where you are looking for your affiliates. Have you exhausted all your options in looking at your competitors’ affiliates? If not, that’s a great place to start. If people are already promoting a company within your niche, you may be able to easily activate them and have them start promoting your efforts.

Approving / Denying Affiliates

The first part to audit during this phase is what criteria do you have for accepting / denying affiliates? It is always a great idea to have something documented. If you are the affiliate manager and must take a leave of absence for whatever reason, it is always great to have guidelines for approval / denial for your affiliate program. The “I just know when I see it” approach may not always work. Once you have this criteria, it’s time to look at the emails that are sent to affiliates who are approved or even denied.

Are your approval and denial emails to potential affiliates optimized for the best activation efforts? If not, this is a great time to audit them. When looking at your approval email to affiliates, it is important to include a recap of the affiliate program information (commission rate, locking period, etc.), as well as pre-built links that affiliates can just copy and paste to get started referring traffic.

Affiliate Management

The next part that we are going to look at during your affiliate program audit is your overall affiliate management.  This area is broken down into a few areas.

First, we want to look at segmentation of affiliates. Are you currently segmenting your affiliates into different categories? For example, affiliates who have never referred a sale. This segmentation can be helpful when running activation / incentive campaigns and you want to provide a bonus for people who refer their first sale.

Speaking of incentives, that’s the next part we want to look at during this part of the audit. Are you currently running incentive opportunities for affiliates? If not, now is a great time to plan these out. You can test out performance based payout increases, cash bonuses for first time sales and any other incentive option you can come up with. Get creative!

Program Optimization

Lastly, we want to audit our program to find out where else we can optimize it to be more competitive and more successful. Starting with a competitive intel analysis is always a great idea. This will allow you to see what your competitors are doing with their affiliate program and you may be able to pull a few ideas from them.

During this phase, you might also want to look at the utilization of co-branded landing pages. We have written about the benefits of co-branded affiliate landing pages before, so won’t go into too much detail here, but implementing a landing page with an affiliate’s logo may help increase conversions. If your program is not currently utilizing these types of landing pages, then this audit can help pull this task to the front of your to do list for 2019.

The start of the new year is always a great time to perform an affiliate program audit and find out where you are in order to plan where to go next.

If you have any questions at all, please contact us. Also, please be sure to Like Us on Facebook.

How to Simplify ShareASale Program Management by Segmenting Affiliates

Data is extremely valuable in evaluating affiliate campaigns. It also helps evaluate affiliate performance and allows affiliate managers to make strategic decisions for their future affiliate marketing campaigns.

Many brands that run affiliate programs do not segment or categorize their affiliates, thus missing out on opportunities to manage their affiliate program in more efficient ways. Filtering and sorting affiliates should be a task that every affiliate manager engages in. In this post, I will outline how to filter and sort affiliates in the ShareASale affiliate network.

Step 1: Navigate to “Affiliate List”

Click the “Affiliates” tab in the main navigation, then “Affiliate List.”

ShareASale Affiliate Filtering & Sorting

Step 2: Choose Predefined Filter or Advanced Filters and Sorting

ShareASale offers three (3) predefined filters to use, but to get more detailed and drill down further – the “Advanced Filters and Sorting” option is the way to go. The advanced filters and sorting will be discussed in detail in the next step.

ShareASale Affiliate Filtering & Sorting


Step 3: Utilize Advanced Filters and Sorting Option

There are numerous ways to filter affiliates, so how do you know what to do? It depends on the what you are looking to do. For example, filtering affiliates that joined the program in the past 30 days. Click “Applied to Program (Date Range) Enter Start Date and End Date and “Click Update Filter“. A list of all affiliates joined in the past 30 days will be shown. From there, affiliates can be placed in groups and/or assigned tags for future campaigns. One of the most common affiliate filtering/sorting options is by “Performance Metrics”. Affiliates can be filtered by sales generated, EPC (or earnings per 100 clicks referred), click volume, commissions earned, etc. Filtering by “Performance Metrics” allows greater flexibility in managing affiliates and does not cast a “one-size-fits-all” approach to managing them.

ShareASale Affiliate Filtering & Sorting


ShareASale makes managing affiliate programs less stressful. Their easy-to-use interface allows program managers to be more efficient with their time. Many affiliate managers are multi-taskers and time is money. Growing an affiliate program requires constant data analysis and having a simple(r) approach to gathering the data is critical. So, make sure you take full advantage of the ShareASale tools at your disposal.

How to View Affiliate Creative Performance in CJ Affiliate

Providing affiliates with plethora of creatives is essential for any affiliate program. The creatives could be banners, text links, coupons/deals, and videos; but providing as many as possible is advantageous for any affiliate program. Having a wide selection of creatives is great, but how do affiliate managers know the top converting ones and what new ones should be introduced? Affiliate networks provide merchants (and affiliate managers) access to important data regarding their creatives. This data helps determine what creatives to keep creating in the future and what ones to discontinue, but will also tell the needed statistics like clicks, revenue, etc.  CJ Affiliate is one of the networks that provides in-depth data on how specific creatives are performing. The following steps will show affiliate managers how to view affiliate creative performance in CJ Affiliate.

Step 1 – Click “Performance” under the Reports Tab

Once logged in to the CJ Affiliate merchant interface, navigate to the “Reports” tab and click “Performance” from the drop-down menu.

Step 2 – Filter Performance by Link

After clicking on “Performance” in the reports tab the next screen will allow affiliate managers to sort performance by links. Under “Performance by” click the drop-down box, select “Link” and then either hit “Run Report” or add a specific “Link ID” to the box. By not adding a link ID it will generate a report with all the creatives in the inventory, but by specifying a specific link it will only show data for that one.

Step 3 – Review Performance of Current Creatives

Each creative (banner or link) will have the following information available to analyze: publisher commission, total commission (includes CJ Affiliate’s fees), sale amount, number of sales, leads (if applicable), items, clicks, impressions, conversion rate, click through rate, and EPC (earnings per 100 clicks).

Whether it is just checking the performance of banners and links for basic knowledge or using the data to build a top-notch creative inventory affiliates can use to grow your affiliate program and their earnings, the data is extremely helpful. Finding out the best converting links (or deals) and banners will help make the affiliate program an affiliate friendly program that will be fruitful for all parties involved.

ShareASale Transaction Breakout Report and Why It Is Important

Want a quick way to analyze affiliate transactions to determine their sources? ShareASale merchants are now using the “Transaction Breakout Report”. This report is exactly what it sounds like. It breaks down affiliate transactions within a specific time frame and tells merchants if the transactions are new customers, mobile transactions, or coupon transactions. I will go into detail below on the report and how to access.

Step # 1 – Accessing the Transaction Breakout Report

Once logged in to the ShareASale merchant account, navigate to the “Reports” tab and then “Transaction Breakout” (second row).

Step # 2 –  Adjust Filters to Get Necessary Data

In the image below, the red box on the left has filter options to use. Select the date range you want to review (ShareASale defaults to the past 7 days), a specific affiliate, breakout metric (mobile transactions, new customer transactions, and coupon transactions. The mentioned filters can be ordered by gross sales, number of transactions, commission, or breakout ratio. Hit “Filter” and the results will appear to the right.

Step # 3 – Review Provided Data

As you can see in the image above, over 91% of the transaction during the week were “Non-Mobile”.

Below the graph will be a detailed breakdown publisher by publisher. This example is based on mobile transactions, but some merchants are concerned with the number of new customers being brought in, so when running the report, remember to change the “Breakdown Metric”.

This report is quite valuable. It can show merchants where time and effort should be focused as well as determine if more or less coupons/deals are needed. The report can also assist in affiliate recruitment. How is that? Merchants can determine that they want to spend more time gaining new customers, so reaching out to prospective affiliates that are similar to the ones currently performing in that category. The “Transaction Breakout Report” is not just a bunch of numbers, but a tool to help (or continue) to grow a ShareASale affiliate program.

Optimizing a ShareASale Affiliate Program with Internal Logos

There are numerous ways ShareASale merchants can optimize their program to increase their brands awareness to prospective affiliates. In the past I, have discussed various program optimization tips on ShareASale to help recruit affiliates, but today I am going to outline a free ways to get the word out there about your affiliate program on ShareASale. It is called “Internal Logo Files.”

ShareASale uses merchant’s logos in various places within their interface to help attract affiliates to merchant’s affiliate programs, and now I will describe where those places are and the requirements.

First, to navigate to this section of their interface you will go to “My Account” -> “Internal Logo Files.”  It will bring you to a page that looks similar to this (see below)

Main Logo

ShareASale uses this logo on the merchant details page, or better known as the page where affiliates sign up to an affiliate program. It can be up to 500 x 500 px, but make sure it is not too large and doesn’t overtake the page. Here is an example:

Search Results Logo

This logo is used on the merchant search results page. When affiliates are looking for new merchants to promote a merchant will stand out more with their 88 x 31 logo shown along with vital statistics of the affiliate program. Having a logo there gives a merchant a better opportunity to be seen and seriously considered. Here is an example of a merchant with one and without:

Product Showcase Logo (small)

If a merchant has a data feed their logo will be displayed when affiliates create product showcases for specific products. This logo should be 120 x 90 px. Here is an example:

Product Showcase Logo (Pop-up)

This logo is very similar to the one right above, but it will be shown when an affiliate chooses the pop-up option. It should be 400 x 75 px Here is an example:

ShareASale Merchant Match

This particular logo helps ShareASale to recruit individual affiliates from local marketing events (Meet-Ups), conferences, and other interactions (magazine, email newsletters, etc.) This logo should be 216 x 384 px. Here is an example:

Merchants, there are up to 5 additional ways to spread the word about your programs via logos within the ShareASale interface (free of charge). It is highly recommended to take advantage of as many of them as possible because you never know what you could be missing out on.

How to Book a ShareASale Featured Program Placement

Are you a merchant with an affiliate program, but struggling to find quality affiliate to promote your brand? If so, you are not alone. One of the biggest struggles is to recruit quality affiliates. If you are a ShareASale merchant then most likely you tend to see an influx of coupon affiliates applying, but the more valuable affiliates are out there, but may need to discovered. What your affiliate program may need is additional exposure to those affiliates. ShareASale offers different ways, through paid placements to reach affiliates that may be a fit for your program. To help in this I am going to show you how to purchase and set up a ShareASale Featured Program of your Category placement. This particular placement displays a logo and description of your affiliate program at the top of the individual category page for which you belong.

Step 1 – Navigating to the Featured Program of your Category Placement

You will start by navigating to the “TOOLS” menu option, followed by “PROGRAM BOOST”. This will take you to the section where you will make the purchase.

Step 2 – Purchasing the Featured Program of the Category Placement

There will be multiple placement options, but you will scroll down and click the “BUY PROGRAM” button for the Featured Program of your Category. The next screen will be to select a month to have the placement run. To the right will be a list of the next 12 months. The green represents “available” and the pink represents “booked”. Click on the month you want to run the placement and click “CONFIRM DATES & PAY”. You will then be asked how you want to pay for it. It can be done from the current ShareASale balance (given there is enough to cover the $300) or credit card.

Step 3 – Setting up the Featured Program of the Category

Now the fun part! Navigate back to the Program Boost page. You will see a tab labeled “MY PROGRAMS”, click that and it will have the placement just purchased. There you will be able to edit the text and add the image needed.

To start creating the placement, click “EDIT”.

You will be brought to a screen that look like the image below. There are four (4) tabs. In the “EDIT TEXT” tab you will place a description of the program along with up to five (5) bullet points highlighting your affiliate program.

To add the banner image, click the “EDIT IMAGE” tab. The image should be in either JPG, GIF, or PNG form and be 350 px wide and 230 px tall. Once the image is loaded click the “PREVIEW & SAVE CHANGES” tab.

This is the final step. Review everything from the text to the banner. If there are any changes needed make them as soon as possible, but you do have up until the day before to modify the placement. Once all is good, click “COMMIT” and you are finished.

Creating brand awareness is a critical piece to a successful affiliate program, but also aids in attracting quality affiliates. For $300 the Featured Program of your Category can get you in front of highly influential affiliates and help take your program to the next level.

How to Implement an Affiliate Data Feed in ShareASale

Data feeds are an important piece to a successful affiliate program. Keep in mind that not every merchant will be able to utilize data feeds since they are designed specifically for merchants with multiple products. Data feeds are files that include information about a merchant’s products. Information that is included is: SKU, price, image, availability, description, etc. A merchant should include as much information as possible so that affiliates can promote their products effectively. How does a merchant make their data feed available to their affiliates? Today, I am going to outline how ShareASale merchants create and distribute their affiliate data feeds.

Step 1 – Navigate to the Data Feed page

A merchant can either use this link – https://account.shareasale.com/m-productmanagement.cfm or they can get there by clicking the “Creatives” tab and then “data feed”.

Step 2 – Requirements

The merchants can now see how what it will look like once a data feed is loaded. It will list the number of products included in the feed, the last date updated, number of times processed during current month, and the number of updates allowed in the current month. By clicking the “View Your Products” merchants can also view their entire product data feed.

There are specific requirements ShareASale needs merchants to include in their data feeds, but not every piece of information presented in their requirements is necessary. By Clicking the “View Data Feed Requirements” merchant’s will see specifically what needs to be included.

The required fields are designated below with a red arrow.  In the column “Null Value Allowed”, No means the field is required. Merchants will want to fill in as much data as possible even if it is not required. The more the affiliates have the better they can promote the products.

After reviewing the requirements, merchants should download the sample file and use it as their guide. Please note that all column headers must remain in the sheet even if they are not complete. If not, the uploaded it will not be successful.

Step 3 – Upload the Data Feed

The data feed file has been completed based on ShareASale’s requirements, so the final step is to upload it.

Click the green “Upload a New Data Feed” button on https://account.shareasale.com/m-productmanagement.cfm.

Click “Choose File” and then “Upload Data feed”. If there is an error, it will pop up and will need to be addressed. To be safe we ask merchants to reach out to ShareASale directly to ensure the data feed properly loaded.

Merchant’s should be updating their feed as often as new products are introduced, removed, changes in pricing, and availability. Affiliates should be armed with the most up to date information in order to successfully market the products.

How To Use Rakuten’s Deal Dispatcher

If you are an advertiser that runs an affiliate program on Rakuten Affiliate Network, then this post is important to read. With Q4 officially under way, it is time to start planning for the key online shopping days leading up to Christmas. Getting your deals/coupons in front of your affiliates will be critical and I will show you how to do that with a step-by-step guide to using RAN’s Deal Dispatcher tool. The Deal Dispatcher is a monthly newsletter sent to subscribing publishers that allows you to advertise special promotions and even publisher promotions (ex. Commission increases, bonuses, etc.).

Step – 1

Log in to your RAN merchant (advertiser) account. Navigate to and hover over “Messaging” in the top navigation and click “Deal Dispatcher”.

ran-1

Step 2 –

Now, this is where the deals (consumer facing or publisher facing) are entered. There are a few things to keep in mind when planning to use RAN’s Deal Dispatcher:

  1. All deals must be entered before the 15th of the month.
  2. You can pay a flat fee and be placed as a “Featured Promotion” To inquire about this just contact your RAN account rep.

It is a very straight forward process to enter and submit deals. The following information must be included:

  1. Promotion Type – use the drop own menu to select the appropriate promotion. The options include: consumer – coupons, consumer – free shipping, consumer – sales/percentage off, publisher – increased commissions/return days, publisher – new creative/link type, just to name a few.
  2. Destination Link –  It could be the homepage or a product specific landing page. The link must properly correspond with the offer being entered.
  3. Promotion Text – there is a 125 character limit, but be as detailed as possible and make sure the deal is worded so that it cannot be interpreted a different way.
  4. Offer – This is the offer going to be used for publishers (aka – terms). Will you be using the baseline offer or create a completely new offer for this promo?
  5. Stat and End Date – make sure to make the deal valid for at least 30 days so that affiliates who may have missed it can still act.

Once everything is filled out, hit “Submit”. If anything is wrong it will let you know what needs to be fixed.

ran-2

If you want to see a sample of the Deal Dispatcher you can do so by clicking the “View the most recent Deal Dispatcher” (you must be logged in to your RAN account) link . Below is a screenshot of a recent Deal Dispatcher newsletter.

us-deal-dispatcher-publisher-help-center-rakuten-affiliate-networkThis is just one step in the process to making sure you are optimizing your affiliate program for the upcoming holiday season.

How to Recruit Affiliate on Rakuten Affiliate Network

Some of the affiliate networks allow the affiliate manager to recruit affiliates directly from the merchant interface. This is a good way to find targeted affiliates that are already familiar with the network, it is what we call “low hanging fruit”. Once recruited and aboard, the activation process is simpler for everyone involved because the education sometimes needed is not required. Rakuten Affiliate Network has this capability and it should be utilized by all affiliate managers with program on this network. I am going to provide a step-by-step guide to recruiting affiliates on the Rakuten Affiliate Network.

Step # 1 – Go to “Find New Publishers” Page

After you have logged in to the RAN merchant interface you are going to hover over the “Publishers” tab and click “Find New Publishers”.

Step # 2 – Fill in the Criteria of the Desired Affiliates

RAN offers various ways to locate prospective affiliates. You can enter the publishers name, site ID, URL (this is done from the drop down box highlighted in the image below). Also, the above mentioned ways can only be used if you know the information, so there are other ways to locate affiliates without knowing all their information. The most ideal way is to target a group of affiliates based on their category. For example, you could be looking for pet bloggers, fashion/beauty bloggers, etc. All you do is highlight the category and hit “include”. There are also more advanced ways to locate affiliates and they include: the date the joined RAN, active affiliates (sending traffic), platinum publishers (top performing publishers on the network), customer reach (geographic locations), business model (coupon, content/niche, comparison shopping, etc.), and publisher location.

ran-1 ran-2 ran-3

Step # 3 – Selecting Affiliates to Send an Offer To

The criteria has been entered and now the list is in front of you. Review the potential affiliate prospect list and begin pushing offers. To push offers to affiliates you want to partner with simply “tick” the box in the left column (you can add all affiliates on the page by “ticking” the box in the gray section.  Once the affiliates are selected, scroll to the bottom of the page and hit “Extend Offer”, then “To Selected”. This will allow you to send an offer to only the affiliates selected.

ran-4

Step # 4 – Extend the Offer

The process is almost complete. Review the offer(s) shown (there may be more than one, but make sure it is the offer with the correct terms.  Hit “Extend”. That’s it, the process it done. Just rinse and repeat each time you want to recruit affiliates within the Rakuten Affiliate Network.

ran-5

A step-by-step guide to recruiting affiliates through RAN is complete, but there is one important item I want to emphasize when recruiting on networks; after the offer is sent always follow up directly with a personal email letting them know an offer was sent and reviewing the terms of the affiliate program. The personal touch will go a long way.