A Step-By-Step Guide to Adding Affiliate Creatives to CJ Affiliate

As I mentioned in my last article on adding creatives to ShareASale, having a nice selection for affiliates to use is essential and optimal. Allowing the affiliates to choose which banners or links to put up will allow them to market your products more effectively. Recently I have set up and launched a number of affiliate programs on CJ Affiliate By Conversant and I thought I would provide a step-by-step guide to uploading creatives to your program on CJ Affiliate.

Step 1 – Locate the Links tab on the Main Navigation Menu of the Merchant Interface.

Once logged in you will need to click on the “Links” tab to begin the process of uploading new creatives (banners/text links) or modifying current creatives.

CJ - 1

Step 2 –  Select “Add New Link”

Click on the “Add New Link” button, a drop down menu will appear and you will then choose which new link (or banner) you want to upload.

CJ - 2

Step 3 – Select Text Link or Banner

As you can see in the image below you have a number of options as it pertains to creatives, but for the purpose of this tutorial we are going to focus our attention on text links and banners only.  Depending on what type of creative you are uploading you will then make the appropriate selection, either text link or banner.

CJ - 3

Step 4 – Uploading Text Links

You will want to give your link a name to differentiate it from others, as well as include the ad copy, a description, relevant keywords for affiliate to search with, a destination URL, and filling in the other fields shown in the image below. Make sure to include as much information about the link as possible in order to get full optimization with your affiliates.

CJ - 5

Step 5 – Uploading Banners

Similar to uploading text links you will want to name the banner, provide a description, include a destination URL, search keywords, and most importantly upload the banner.

CJ - 4

You will want to repeat the same process for each additional banner and text link. Unfortunately, CJ Affiliate does not have a mass banner/link option like ShareASale does, but it is still a straight forward process that is essential in daily affiliate program management.  Whether you have an affiliate program on CJ Affiliate, ShareASale, or another network your creative inventory should be taken seriously and showcased in professional manner.

Adding Affiliate Creatives to ShareASale: Step-By-Step Guide

Having a good selection of creatives for your affiliates to use is important. Banner ads and text links are the two most common forms of creatives given to affiliates to market products/services. Designing them and making them affiliate friendly is one thing, but how do you make them available to affiliates? I will show you a step-by-step guide to uploading banners and text links in ShareASale.

Step 1 –  Locating the My Creatives tab

After logging into to your ShareASale merchant account you want to locate the “My Creatives” tab on the top navigation.

SaS Creative 1

Step 2 – Select Add Creative

You will need to hover your mouse over the “My Creatives” tab, it will provide a drop down menu. The drop down menu will show the various options like “Add Creative”, “View Creative Inventory”, “Post Coupon Deals”, etc. You want to click on “Add Creative”. You will then be directed to the page where you can start uploading your newly created banners/text links.

SaS Creative 2

Step 3 – Uploading Banners

Whether you are uploading one banner or one hundred it is still a straight-forward process. ShareASale has made uploading banners extremely easy. Make sure that you are on the “Upload Banner” page and then you can either drag and drop the banner where it directs you or you can choose the file from your computer. If you want to upload multiple banners at once ShareASale has a “Mass Banner Upload” option that will save you time. Next, you will want to add the URL to where the banner will be linked, provide a name for the banner, assign a category, add alternative text (if applicable), and set the privacy option. The privacy option allows you to make the banner(s) public to all affiliates or to select affiliates of your choice. Once complete hit “Send to Us” and it will be ready for affiliates to use.

SaS Creative 3

Step 4 – Uploading Text Links

This is a very similar process to uploading banners. Make sure you are on the “Upload a Text Link” page. There is a drop-down box to toggle between uploading banners and text links. First, add the URL where the text link is going to be directed to. In the square you want to put exactly what you want your text link to say (i.e. 50% Off Widgets). As with uploading banners you want to name the link, assign it a category and set your privacy settings (i.e. public to all affiliates or specific ones). Once all the details of the text link have been added click “Send to Us” and it will be available in your creative inventory.

SaS Creative 4

Step 5 – Check Uploaded Banners/Text Links

Once you have uploaded all your banners and text links you should check to make sure they loaded properly.  On the top navigation you want to click “My Creatives” and then “View Creative Inventory”. From there scroll down and you will see two tabs titled “Banners” and Text Links”. This will tell you how many banners and text links you have.

ScreenHunter_423 Feb. 05 10.44

There you have it, a quick guide to uploading banners and text links in ShareASale. It is not difficult, but if you are not familiar with the interface it can be time consuming and tedious. Providing a thorough inventory of banners and text links is essential, therefore, knowing the most popular sizes to create is imperative. Want to know the most popular affiliate banner sizes? Check out my post on affiliate banner ads.


5 Common Affiliate Banner Mistakes to Avoid

On December 19, 2014 I wrote a post that discussed affiliate banner ads, more specifically requirements, sizes, and examples of affiliate banners. With my first post of 2015 I would like to discuss 5 of the most common mistakes (I see) made when creating affiliate banners. The mistakes that are going to be discussed are ones seen most often when working with merchants and can be the difference for an affiliate to use a competitor’s banner ad.

Mistake # 1 – Poor Graphics

This one in particular can be the difference for an affiliate to market a competitor’s product. Graphics should be clear and not pixelated. Merchants should be sure that the version of the graphic they are using is high quality and looks good on the created banner.

Mistake # 2 – Font Unreadable

This is one mistake I see way too often. Why would you include text on a banner when it is not legible? Font that is either too small or blurry will do more harm than good, in fact it may hurt the conversion rate. If you want to include a tagline or some other text on banners that is fine, but including it on small banners (i.e. 88×31) is not recommended.

Mistake # 3 – Brand Not Included

How are the potential customers supposed know who the product is being marketed by? Including the brand should be a top priority and should never be omitted. In my time managing affiliate programs I have seen this mistake more than I would like to, so never forget to include your brand name/logo.

Mistake # 4 – No Call to Action

A clear call to action is a must for all affiliate banners. Do not assume that visitor knows to click the banner, so ASK them by including the appropriate call to action. Examples of calls to action include: Shop Now, Click Here, and Learn More.

Mistake # 5 – Missing a Border  

This is by far the most common mistake I see when merchants create affiliate banners. The banners can include amazing graphics, a concise message, and a call to action, but are missing a small, yet important detail: a border.

Banners created with white or very light backgrounds get lost in the white backgrounds of affiliate sites. Be sure to include a 1 pixel line around the border of all affiliate banners to ensure your banners stand out.

If you avoid making the 5 common mistakes referenced you will have quality affiliate banners that affiliates will be proud to display on their sites. Affiliate banners are another marketing tool, so make sure they represent your brand in the way you want.

Affiliate Banner Ads: Requirements, Sizes, Examples

Banners are an integral part of any affiliate program, but in some instances merchants do not understand how important they really are. Banners and text links make up an affiliate programs creative inventory that affiliates used to promote merchants products or services. Affiliates use them in a variety of ways and require them in multiple sizes.

When we at AM Navigator either take over management of an existing affiliate program or start one from scratch banners are among the most popular issues/topics we discuss with clients. In a few instances I have seen banners not include a sales message or a call to action; so what is the visitor supposed to do? The key is to make the banners entice the visitor to click and buy. Many merchants are unsure of the protocol for creating affiliate banners, including the key elements to an effective affiliate banner and the sizes they should create. Examples of quality affiliates banners can be found by clicking here.

I will go over the 3 main elements an affiliate banner requires and provide a list of banner sizes (and quantities) that we recommended when running an affiliate program.

All affiliate banners require three elements:

1.       Clear Visual Elements

2.       Concise Message

3.       Call to Action

Without the three above elements the banners will not be attractive to affiliates and they will not convert.

Affiliate banner size recommendations (with recommended quantities):

88×31 px button – 2-5
468×60 px – 2-5
125×125 px – 2-5
120×600 px – 2-5

160×600 px – 2-3
120×240 px – 2-3
234×60 px – 2-3
254×331 px – 2-3
728×90 px – 2-3
250×250 px – 2-3

720×300 px – 1-2
300×100 – 1-2
300×250 px – 1-2
180×150 – 1-2

The banner sizes above are broken into 3 groups based on demand from affiliates. Even though the list includes all the most popular sizes, affiliates may still have special requests for custom sizes, so you must be ready to create additional ones that may include different color schemes and images.

The 88×31 is by far the most popular size among affiliates because it can be used in different ways. It is the most popular with coupon/deal oriented affiliates. We recommend having at least 2 created in different styles.

Affiliate banner creation should be taken seriously and include the 3 elements outlined above and most of the sizes discussed. Without quality banners available to affiliates, the less likely they may be to promote your product/service. Next week I will discuss mistakes to avoid when creating affiliate banners.

How To Start an Affiliate Program on CJ Affiliate Network

On November 21st I wrote a post on setting up an affiliate program on ShareASale, now today I am going to walk you through setting up an affiliate program on CJ Affiliate By Conversant. Over my time managing affiliate programs I have seen the set-up process not complete or the merchant decided to shortcut the process. The set-up process should be done with careful precision to ensure you are presenting your affiliate program in the best possible light upon launch. The following guide will go step–by-step in setting up your CJ affiliate program. In total there are seven (7) steps that you must follow.

Step 1 – Technical/Tracking Implementation

Once the contract is signed it’s time to start getting your site ready to handle the affiliate traffic and sales.  CJ will send you a tracking integration questionnaire to complete and once complete they will create and send you all the conversion tags needed for your site.

The next step in the technical/tracking implementation process is to install the conversion tags provided. You will need to tag all pages of your site and all conversion pages. Once tracking implementation is complete then you must test to ensure everything is working properly.

Testing the tacking pixel involves 4 test purchases:

  • Test # 1 is without a discount
  • Test # 2 is with a discount (both whole order and item level)
  • Test # 3 is with discount (whole order)
  • Test # 4 is with a discount (item level)

Once all four tests have been complete next step is to confirm tests worked, cookie information and site tagging are functional.  Now you can move on to completing the program settings.

Step 2 – Program Settings

There are six pieces that need to be complete and they include:

  • Upload a logo (150×40)
  • Set up publisher accept/decline criteria

This is where you determine how you are going to manage affiliates that apply to your program. I recommend not auto-approving any affiliate, but manually reviewing each application. You can also add specific countries to the auto-decline and manually approve lists.

  • Enter Search Keywords

Add keywords related to your brand. This is what affiliates use to find programs to partner with

  • State Serviceable/Shipping Areas

Where do you ship your products to? What countries do you currently service?

  • Confirm category

CJ has a plethora of categories to choose, but make sure it is relevant to your business

  • Draft and upload Program Description

This should describe your company and the products/service being offered, the commission being offered, and any other details that affiliates will need to know prior to joining.

Step 3 – Branded Sign up Settings

This phase of the process involves three (3) aspects:

  •  Introductory Message

This should be crafted in a similar way to your program description

  • Application Response

This should be a short message to affiliates once they apply to inform them that their application is under review and a decision will be made shortly on their status.

  • Header graphic should be added: Size should be 468×60

Step 4 – Program Terms

This is where you determine your program policies and search guidelines. This is important because the information loaded will tell affiliates the “rules” they must play by. Also included here is the commission to be paid out, cookie life, and any other terms that affiliate partners should be aware of.

Creating customized program terms is also an option here. For example, if you partner with an affiliate that you are going to pay a different commission rate to they must be on their own program terms and not included in the “default” terms.

Step 5 – Add New Links

This step is where you upload all your freshly created banners and text links. Use the “links” tab to upload banners and text links.

Step 6 – New Publisher Email

This is where you create the email that is sent to affiliates upon acceptance. It should include information on your company, products/services, paid search guidelines, links to creatives to get them started with, and most important, contact information.

Step 7 – Request Activation

Once the six steps above have been complete you can request your affiliate program to live.

You go to: Support Center>The Basics / Getting Started

Whether you are launching an affiliate program on ShareASale or CJ, there are steps that need to be carefully completed in order to successfully launch.  Follow the above seven steps and you will have an affiliate program you can be proud of on CJ Affiliate By Conversant.

How To Guide to Starting an Affiliate Program on ShareASale

You are ready to start an affiliate program and have decided to use ShareASale as your affiliate network, but now what? Setting up an affiliate program can be a daunting task, but let me show you a step-by-step approach to successfully set-up an affiliate program on ShareASale. In total there are 8 steps and I will describe what needs to be completed within each step.

Step 1 –Commission Rates and Program Description

This is where you determine your default commission rate per sale and/or lead. It can be entered as a percent or dollar amount (make sure the correct radio button is marked). If you are going to be doing a two-tiered commission structure this is also where you enter that information.

The program description should describe your product or service, the commission being offered and any other enticing details that will get affiliates to join. Along with the program description you should create your program agreement. This document will lay the ground rules for affiliates to follow while promoting your product/service.  It should include SEM restrictions, coupon policy, and other restrictions affiliates should be aware of. Finally, make sure to add your logo here. It should be no larger than 300 pixels wide and 200 pixels high.

Step 2 – Administrative Options

This step is where you have the options to control the behaviors of your affiliate program. Tasks to be completed include:

Setting the auto-approve affiliate option -we recommend reviewing each application individually.

Reply email text – this is the message that gets sent to potential affiliates when they apply to your program. It generally includes a short message informing them that their application is being reviewed and decision will be made within 24 hours and if there are any questions to reach out.

Email notifications (when affiliates join your program) – not necessary, but you can select “yes” to make sure you are reviewing each application as they come in.

Low balance notification – we recommend getting notified, just in case!

Balance threshold notification – you get an email notification when your balance hits the threshold entered here.

Email when a sale/lead takes place – This is totally up to you, but it could just be filling up your inbox. You can see all new transactions upon logging into the main interface of your program.

Tracking Cookie – How long do you want the time to be between the original click through and the sale? 60 days is their default, but you can select whatever one makes sense for your business.

Step 3 – Choose a Program Category

In order for affiliates to find your program you need to select a category. There are almost 40 categories to choose from (they only let you choose 1), so make sure you select one that relates to your business. You also add keywords here for affiliates to use when searching through ShareASale for merchants to partner with.

Step 4 – Place Tracking Pixel

We are getting closer to launch now. This is the most important step of the process because the pixel you will be installing on your site will be tracking all affiliate activity and will be the tracking mechanism for your program (clicks, sales, etc.). We recommend having a person with an IT background install to ensure it is done properly.

Step 5 – Testing the System

Once the tracking pixel is installed you must make sure it is working properly. What happens here is you do a test purchase to make sure the pixel is firing when necessary and all the information is being collected by ShareASale.  The transaction completed will be voided before the program goes live.

Step 6 – Funding the Account

General rule of thumb here is to deposit a minimum of $100 to start. Once the program is live you can set up the auto deposit feature (highly recommended) and deposit more money if you desire to cover sales that may come in initially.

Step 7 – Upload Creatives

In this case “creatives” mean your banners and text links. Depending on how many banners you have created there is an option for a mass upload as opposed to doing it one by one.  If you are not sure what banners to include check out this article that will provide more clarity.

Step 8 – Request Activation

This is final step. Once steps 1 -7 are complete you can request your affiliate program go live to ShareASale. Once activation is requested it may take 24-48 hours to go live. ShareASale checks everything again on their end to ensure you are 100% ready to start running an affiliate program

There you have it, a guide to starting an affiliate program on ShareASale. Follow the steps carefully and you will have a live affiliate program. Now it is time to start recruiting and making money.

10 Elements Needed to Launch an Affiliate Program

As a merchant you have decided to start an affiliate program, but you are not sure where to begin. This is common problem because there are so many components needed to launch a successful affiliate program and your knowledge of affiliate marketing may not be there. Where do you begin? There are 10 major elements that need to be completed in order to launch an affiliate program.

1. Competitive Intelligence

This is the most important piece in getting the program off the ground. Compiling data about your competition will guide you on many of the other necessary pieces to launching an affiliate program. What you want to do here is find competitors (or merchants as closely related to your niche) and see what network they are running on (ShareASale, CJ Affiliate By Conversant, LinkShare, In-House platforms), what commission structure they have in place, what is their cookie duration, and their current EPC statistics. Once all the data is gathered it will guide you in deciding how to structure your program.

2. Choosing a Network

You do not want to choose a network strictly based on cost, but rather where your direct competition is and where affiliates are that will be willing to promote your product/service. For example, if most of your competition is on ShareASale and they are having success, then ShareASale should be strongly considered as the network to launch your program on because they have the affiliates that would be a perfect fit to your program.

3. Commission Structure

This is a tough step for many merchants, but if you performed an in-depth competitive analysis the decision should be less stressful. Being competitive in terms of payouts is a must, but deciding how to structure them is another story. Do you want to offer a flat fee (i.e. $25 per sale), a percentage of the sale (i.e. 10%), or offer a tiered structure based on performance (i.e. if sales exceed $2,000 per month then commission paid will be 12%, up from 10% default)?

4. Cookie Duration

This will also be determined by the competitive data gathered earlier in the process. Affiliate transactions generally occur within the first week of the cookie being dropped. After 30 days a majority of users delete their cookies. 30, 60, 90, and 120 are commonly used cookie durations, but it is up to you and how you think it will impact conversions for your program.

5. Program Bio

This is what the affiliates see when they are searching for merchants to promote within the network interface. You want to include as much pertinent information as possible to make the decision easier for prospective affiliates to choose your program. Items to include are:

a. Brief description of your company

b. Affiliate program details that include: commission structure, cookie like, opportunities to earn more money, and other major selling points.

6. Email Templates

These are what are sent to affiliates upon applying to your program, being accepted into the program, or being declined.

a. The apply email template – this email should include verbiage stating we received your application and are reviewing it and will notify you within 24 hours of our decision as well as contact information.

b. The decline email template – this email should include reasons for possibly being declined and also provide them the opportunity to appeal the decision by contacting you or the affiliate manager directly.

c. The acceptance email – this email should provide a description of your company, on overview of the paid search policy, the program details (commission, cookie life, etc.) and 3 – 5 creatives to get them started with.

7. Terms of Service

This is critical to any affiliate program. It outlines the rules and regulations of the affiliate program. It goes over expected behavior and consequences if not followed. If affiliates violate the TOS at any time you should communicate with them what part of the TOS was violated and expectations moving forward. Any changes made to this document after the fact must be communicated to the affiliates immediately.

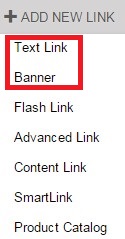
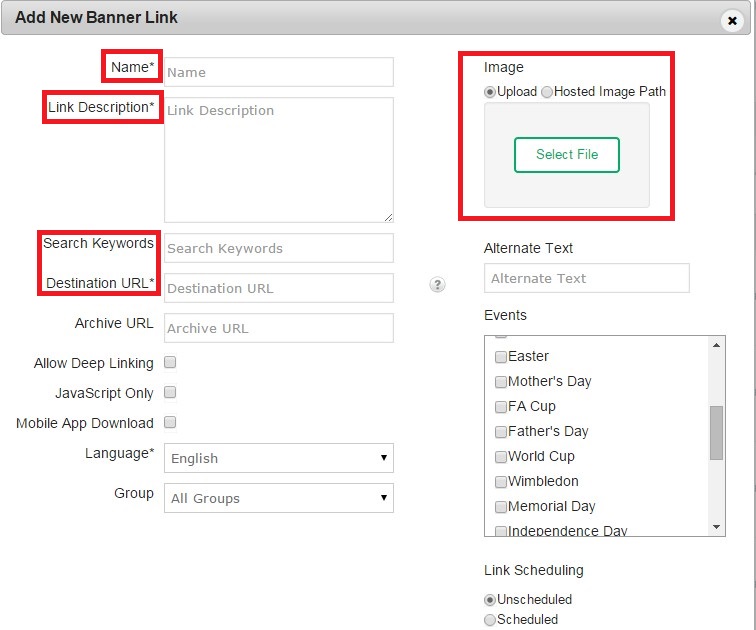
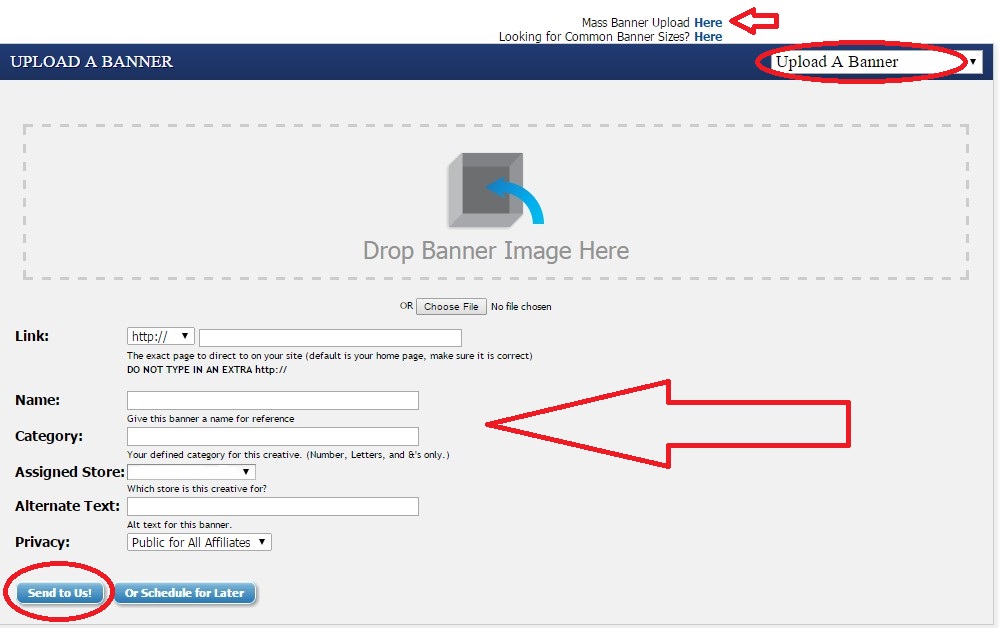
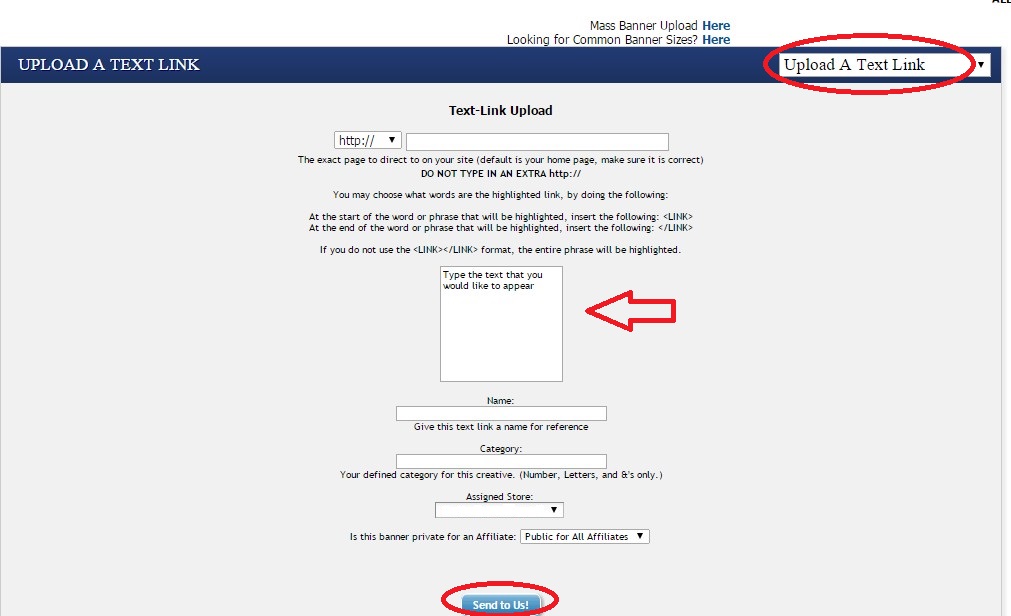
8. Banners/Text Links

Affiliate use them to promote your products/services. When creating banners for your affiliate program there are a few requirements that must be met in order for them to be quality banners. Check out this article by Geno Prussakov on banner requirements. Text links on the other hand need to be catchy and be relevant to what you are selling. Providing your deals in the form of text links is a great idea because affiliates can insert them into their own content and they can also be deep linkable.

9. Coupons

Offering coupons is great way to increase conversions through your affiliate program. Starting out with 2 – 3 coupons will give your affiliates another way to market your products. For example, offering a free shipping coupon or a % off to start can get the affiliates excited.

10. Policing Tools

Compliance may become an issue in your affiliate, but the question is how do you monitor what your affiliates are doing? There are tools out there that monitor various aspects of your brand and they include:

a. Paid Search Monitoring – you can find out if any affiliates are bidding on your trademarks through Google, Bing, Yahoo, or AOL ads.

b. Content Monitoring –  you can find webpages that match your current offers being produced by affiliates.

c. Domain Monitoring – you can find out if affiliates are purchasing domains with your trademarks in it as well as misspelled variations.

d. Social Media Monitoring – you can see if affiliates are promoting your brand through social media in accordance with your terms of service.

e. Coupon Code Monitoring – this is used when you do not want affiliates to promote certain coupon codes. This can also be used to determine if affiliates are harvesting coupons from your site or email newsletters.

Launching an affiliate program does not have to be a daunting task. Ensuring it is optimized is the first step on the road to success. Being competitive and providing affiliates what they need to be successful is the name of the game, but ongoing management will be ultimately determine success or failure.