Adding Banners in Rakuten Affiliate Network

Continuing the series of articles on the Rakuten Affiliate Network interface, today will be centered around adding banners. We are back discussing links, but more specifically, how to add banners to the account for affiliates to use. A step-by-step guide will be outlined to complete the task of uploading banners in your Rakuten Affiliate Network account.

Step # 1 – Click the “Links” button in the main navigation

In a similar way to adding text links, you will click the “links” button in the main navigation. You will be shown all the different types of links available, then click “banners”.

LS 2

Step # 2 – Add New Banners

You have the option to add banners manually or import them via a csv file. Click the “add new banners” button. If there are any banners currently in your inventory you have the ability edit them here too.

LS 4

Step # 3 – Add New Banners (Con’t)

This is part where you add the details of the banners. You have the option to host the banners on your server or have RAN (Rakuten Affiliate Network) host them, the choice is yours, but fees may apply if RAN hosts them. First, choose the banner file you want to load, name the banners (e.g. Labor Day Sale – 250×250), landing page URL (could be homepage or a specific dedicated page to the sale), size of the banner, start and end date, and who the banner will be assigned to. You can assign the banner to all affiliates, a group, or individual affiliates (just like text links).

If there are multiple banners to upload simply hit the button “add another”. It will add another box where you place the details of the banner, just like you did with the first one. You do that until all the banners have been input and hit save. You will then be directed to the entire live inventory of banners to view and edit if necessary.

LS 3

Another quick guide to navigating the Rakuten Affiliate Network interface is complete. Providing creatives to affiliates is a must do task, but also must be done correctly. If you are having trouble with what sizes to create please ask me in the comment section and I will provide a list of popular banner sizes.

How to Submit a Support Ticket in ShareASale

There are many tasks an affiliate manager needs to complete on a daily basis and their time is precious. When a problem comes up or there is an issue that cannot be solved, where do  ShareASale affiliate managers go? ShareASale has one of the (if not THE) best support centers among the major networks. They reply quickly and offer detailed solutions to the issue being faced and are extremely willing to help in any way possible. Here is a step-by-step guide to submitting a support ticket within the merchant interface.

Step # 1 – Click the Help Link

SaS1

Once logged in to the ShareASale merchant interface you will navigate to the top left corner of the page and click the help link. The link will direct you to “Help Center” where you can begin the process of submitting a ticket, but also view old support tickets and view FAQ’s that may help answer your question before submitting a ticket.

Step # 2 – Submit a Ticket

Click the “Submit a Ticket” link and it will take you to the page where you  start creating the ticket.

SaS2

Step # 3 – Complete the Support Ticket

The “Priority” drop down box should be left at “Normal”  and the subject should be as descriptive as possible (what the issue is).

Within the body of the ticket it is imperative to explain the issue/problem that is being experienced so that the ShareASale Support team can provide recommendations/solutions as quickly as possible. If there are any documents needed to support the issue they can be attached as well. This is ideal if you have screenshots of the issue in question. Once you have completed the ticket message, click “Submit” and the ticket will be queued up within ShareASale and should be answered within a few hours.

SaS3

The support inquiries can be a simple as how to create a text link or as complex as setting up tracking for new and existing customers. No matter the issue or problem ShareASale will be there to help and guide you through it. They have people in dedicated roles to ensure proper handling and results. If you want to save some time for minor issues you can call their support team on the phone too.

A Guide to Affiliate Program Competitive Intelligence Research

When introducing an affiliate program to your marketing mix it is essential to treat it the same as your other channels (i.e. search, paid search, email, retargeting, etc.) because it is just as important, and in some cases the most important piece to a company’s marketing mix.  Why do I say that? Simple, I have seen many occasions where a company will just throw an affiliate program up on a network without doing any competitive research and they hope for the best. An affiliate program can be a very profitable avenue if set up and managed correctly. Conducting a comprehensive competitive intelligence review is vital and should be done when starting (it should also be done periodically once the program is live)a new affiliate program so that you are competitive and attract the desired affiliates. There are eight (8) main components to a competitive intelligence report and they include: competitor’s name, affiliate platform, CPA, incentives, cookie life, action locking period, ranking, and EPC. I will go over each component in detail to ensure you capture all the necessary information.

#1 – Competitor’s Name

This may seem pretty obvious, but you may discover that they operate under multiple names or have multiple affiliate programs, so getting their name and the URL’s they use for any and all affiliate programs.

#2 – Affiliate Platform

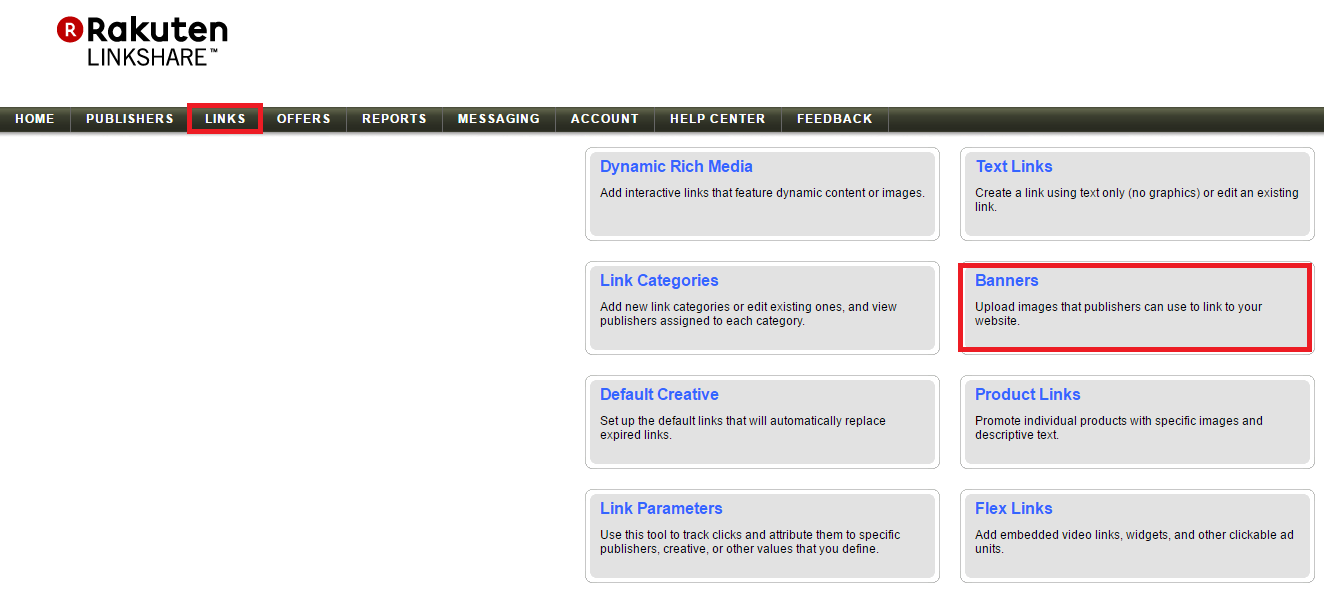
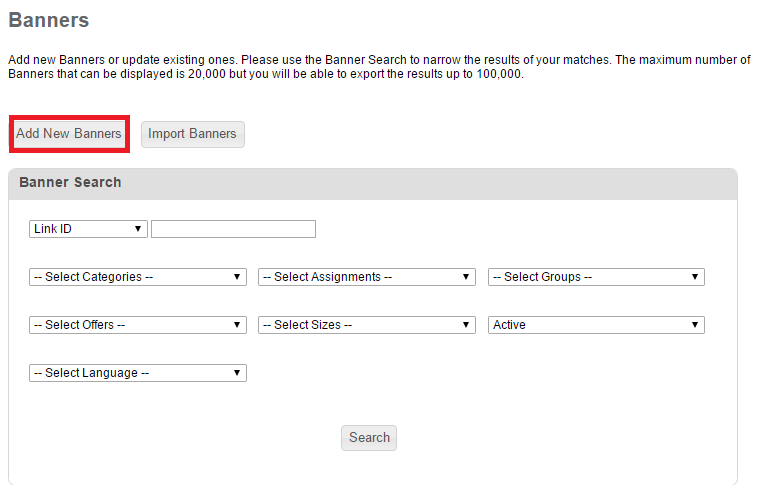
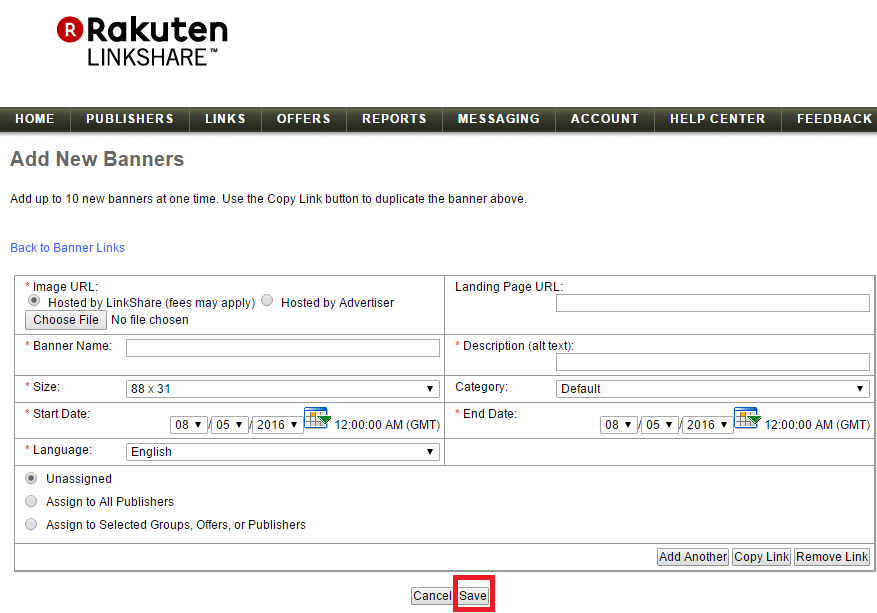
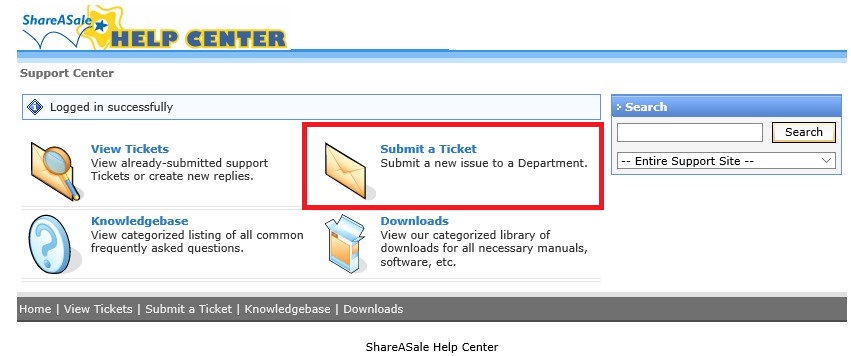
Once you gather the competitors name (s) the next step is to see what platforms or affiliate networks they currently run their affiliate programs on. They may run their program on a major network (CJ Affiliate, ShareASale, Rakuten LinkShare, etc.), but they may also run it on a private software (CAKE, Post Affiliate Pro, HasOffers). A major affiliate network may not be the best place for every merchant, so finding where your competition operates helps in making a platform decision.

#3 – CPA (Cost Per Action)

This is an important component of the intelligence gathering. As a merchant you want to make sure your CPA (or Cost per Lead) is competitive with the competition because affiliates take payout into consideration when promoting merchants and if you are totally off line with the competition it is less likely you will have high quality affiliates promoting your product/service. With that being said, determining the CPA must also make sense financially, not just because the competition is doing it.  Remember if you are on a major network they take a percentage of every sale too, so keep that in the back of your mind when determining payouts.

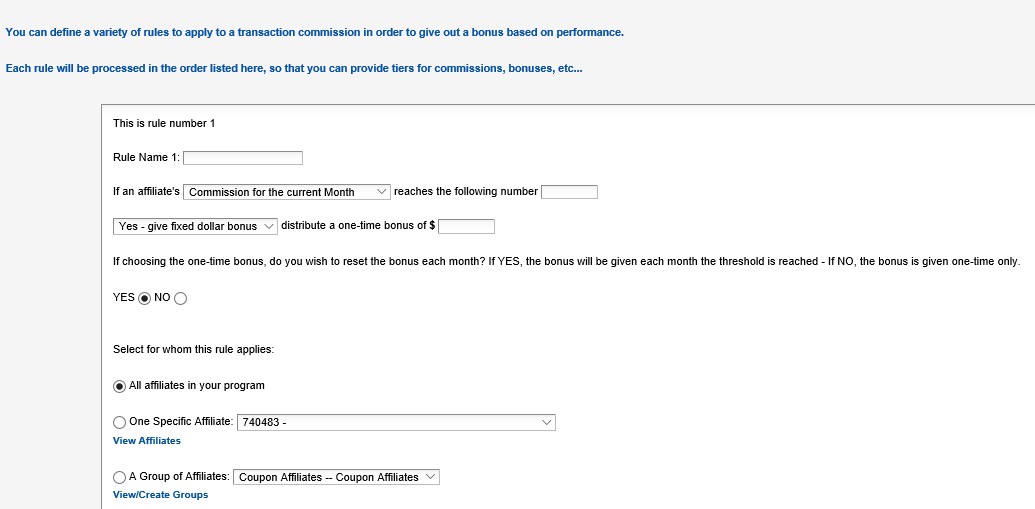
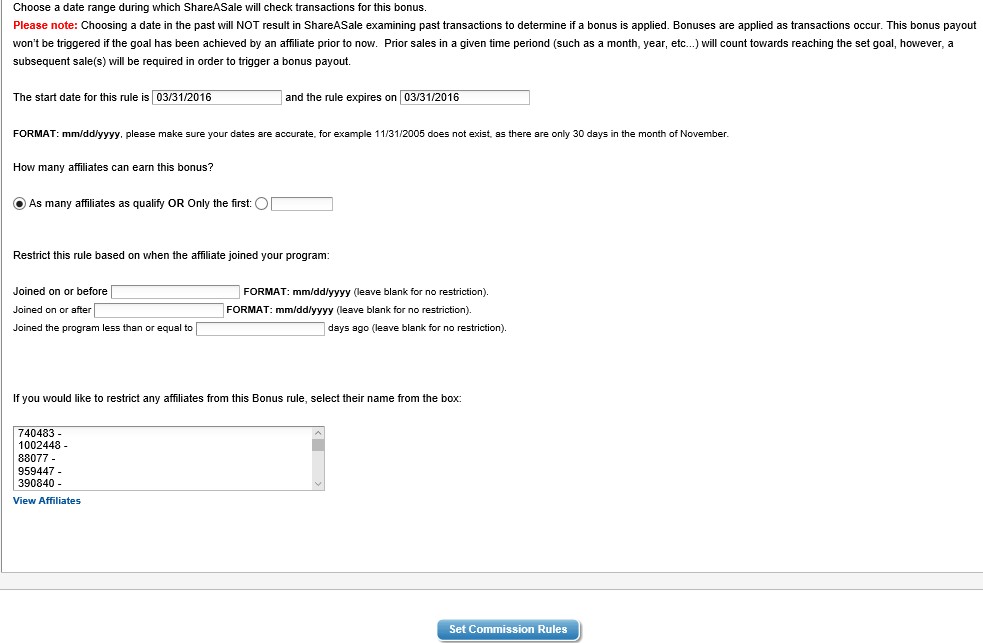
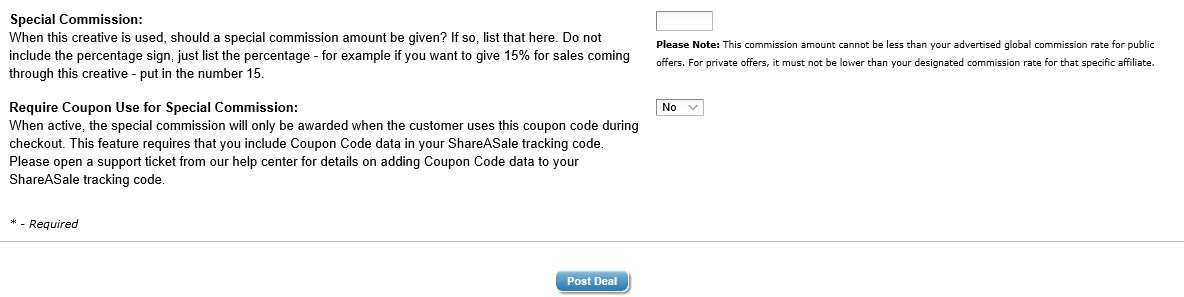
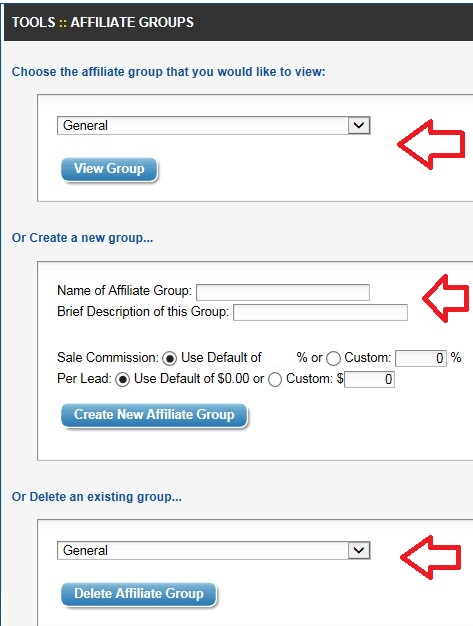
#4 – Incentives Offered

Does your competition offer incentives to affiliates? If so, take note of them and try and incorporate them into the affiliate strategy. For example, a merchant is offering a $50 first sale bonus, or a tiered commission structure (default is 10%, but based on sales it can increase to 15%). The examples mentioned will also help in determining the CPA for the program, but also helps to increase affiliate activation once approved.

#5 – Cookie Life

Affiliates like to see a longer cookie life, but in reality a majority of affiliate sales occur within the first couple days. If the competition has a 30 day cookie the best bet is to have your cookie length at least 30 days, but can be higher. For an activation tip you can offer select affiliates a cookie life increase if they perform a certain action (i.e. 2 sales in the next 7 days and their cookie will be bumped two-fold ).

#6 – Action Locking Period

This is important for the fact that product returns happen and merchants want to protect themselves from paying commissions on returned merchandise.  ShareASale’ s default locking period is the 20th of the following month in which the transaction took place, where CJ Affiliate’s default is the 10th of the month. However, the locking period can be customized to a merchants return policy. If a private label platform is chosen then the merchant selects the day transactions lock and payments are made.
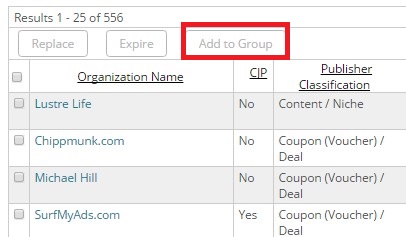
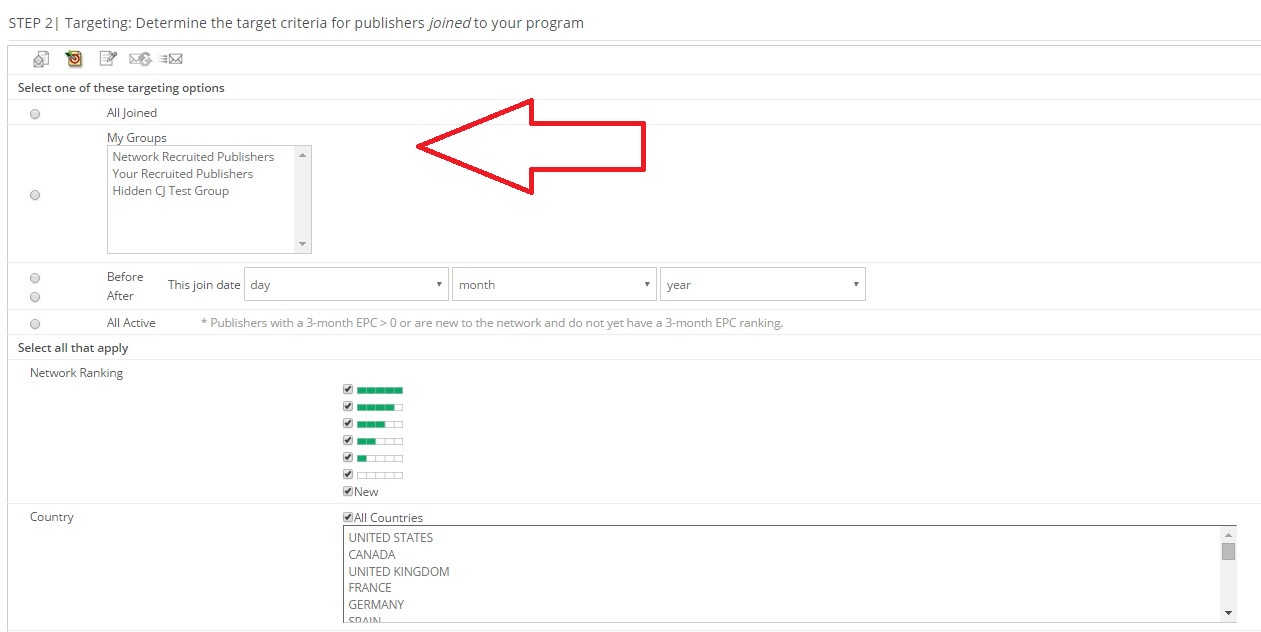
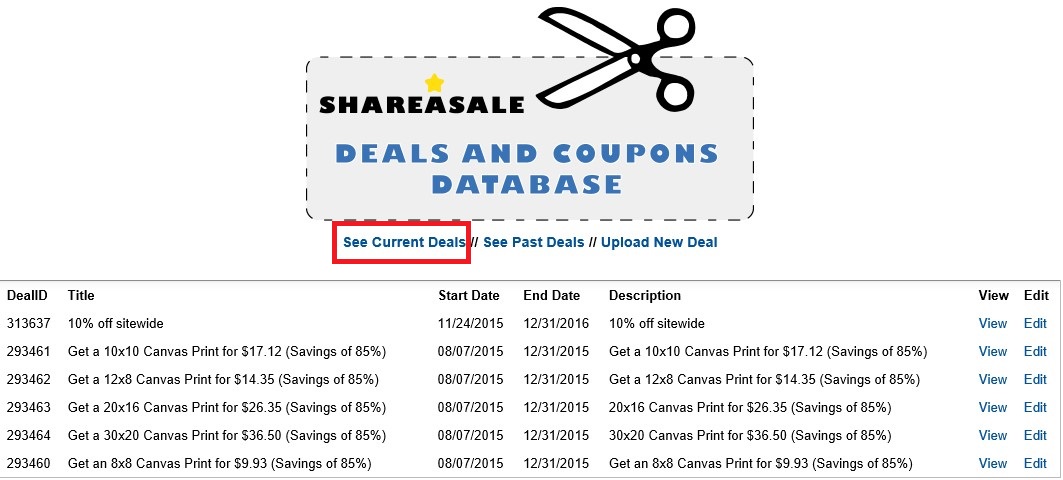
#7 – Program Ranking

Checking how your competition ranks on a particular networks will show you the amount of success they are having (or not) and if they have an affiliate base that will be substantial in promoting your products/services. As examples, CJ Affiliate uses a 1 – 5 bar system. 1 being the lowest and 5 being the highest, whereas ShareASale ranks their top 100 merchants.

#8 – EPC (Earnings per 100 Clicks)

This metric is important because it shows merchants if affiliates are actually making money promoting the competitors’ products/services. Merchants with a high EPC shows that affiliates are making money and its offers are effective. On the other hand, merchants with low or no EPC numbers show the offers and program are not performing well and affiliates are not making money. These numbers will help aid in the decision of what platform to choose. One network may have high EPC numbers, and the other may have lower numbers, which means the network with the high numbers has affiliates that cater to that specific market and should be considered.

Creating and managing an affiliate program takes deep competitive intelligence in order to be successful. The eight components of a competitive intelligence report should be compiled and reviewed intensively and then based on the data create an attractive, yet competitive affiliate program that has the chance to be successful for years to come.

Creating Publisher Groups in CJ Affiliate Network

Do you have trouble communicating with your affiliates? Do you have messages for different types of affiliates? Are you unsure of how to send different messages to different affiliates? If you answered yes to any of the three questions I am here to help. I have seen it numerous times when we take over management of affiliate programs for clients and their affiliate database is a complete mess, but it doesn’t have to be. If you are a merchant with your affiliate program on CJ Affiliate I am going to show you how to create groups for your affiliates and how to put them in the appropriate group(s). After you read this article you will have one of the most organized affiliate databases out there.

Step # 1 – Go to “Groups” tab

CJ 1

After you are logged in to your CJ Affiliate account click the “Publishers” tab and then click the “Groups” tab. This will take you to the page where you will create groups to place your affiliates in.

Step # 2 – Create Affiliate Group

There will be groups already created, but they were done so by CJ Affiliate. To create a new group click the “Create Publisher Group” button to the far right of the screen. A pop-up box will appear next.

CJ 2

Step # 3 – Name your new publisher group

This is where you name the group. You want to be as clear as possible so in the future you know exactly who is in the group. Once you complete inputting the name click “Save”. Your new group has been created and the next step is filling it with affiliates.

CJ 3

Step # 4 – Add affiliate to a group

Go to your affiliate list (through “Publishers” – Manage by Program Terms”) and check affiliates that you want to include in your newly created group and then click “Add to Group”.

CJ 4

After you click “Add to Group” a pop-up window will appear and you will select the group to place the affiliate in from the drop down box. After the group is selected click “Add” and then you are finished.

CJ 5

That is it. Instead of sending all your affiliates the same message, this functionality allows you to now segment message to specific affiliates. You may have a bonus opportunity for content affiliates, but do not want coupon/deal affiliates to see this, so having groups set up will allow you to send to the audience you want.

Setting Up Affiliate Bonus Campaigns in ShareASale

Are you looking to jump start your affiliate program? Is it new or just not producing the results you want? You are not alone; there are many affiliate programs (new and established) that are looking for ways to increase sales through their affiliate program. It takes a lot of hard work to grow an affiliate program, but if you are a ShareASale merchant they make it easy for you to arm affiliates with the tools they need to be successful.  A popular way to get traction with an affiliate program is offer bonus promotional campaigns. ShareASale offers a simplistic way to set up bonuses (recurring or one-time) with affiliates so you can concentrate on continuing to grow the program. Here is a step-by-step guide to setting up bonus promotional campaigns in ShareASale

Step #1 – Navigate to the Bonus Promotional Campaigns Page

After you logged in to the ShareASale merchant interface, go to “Tools” then go to “More” and click “Setup Bonus Campaigns”. It will take you to – https://account.shareasale.com/m-transactionrules.cfm

Step #2 – Define Your Rules for Bonus Payments

As I mentioned previously, this is a very simple process, but you have to make sure you are careful and review your choices. The first half of the page is where you want to name the rule (so you can identify it), what the threshold is (amount of commissions in a month, sales or clicks), whether it will be a flat dollar amount of a percentage, recurring bonus or one-time, what affiliates are to be included.  This is what makes this tool great, you can include or exclude whoever you want. If you do not want to include coupon affiliates in the bonus, simply do not add them.  A quick tip: if paying bonuses by group or types of affiliates make sure you have groups set up so you do not have to go in and manually remove/add affiliates.

ScreenHunter_707 Mar. 31 09.40

ScreenHunter_709 Mar. 31 09.41

Step #2 (cont.) – Define Your Rules for Bonus Payments

Continuing down the page and finishing up the set up process, next choose the date you wish to start (and end) the campaign. This is important because the bonuses will only be paid within the period you select and it cannot go back in time and credit affiliates. If you do wish to go back and credit affiliates you can “Post a Manual Transaction”, but that is a topic for a different day.  You can restrict affiliates based on their join date (when they were approved in the program) or you can simply select their affiliate ID from the box and they will be excluded. There are multiple ways to customize this tool to ensure you have the best bonus campaign available with who you want to participate.

Once all the fields are complete, hit the “Set Commission Rules” box and it will be saved and activated on the date you input as the start date.

ScreenHunter_708 Mar. 31 09.41

Activating affiliates in your affiliate program is a must (new or existing program). With ShareASale’ s “Bonus Promotional Campaigns” tool it allows you to fully customize an activation campaign based on the metrics you choose, and they best part of it is that ShareASale handles everything. With all the time you will save you now can focus on recruiting new affiliates and growing the program to new levels.

Top 5 ShareASale Affiliate Program Setup Mistakes

As an Outsourced Program Manager (OPM), I manage accounts in a variety of verticals and on all the major affiliate networks, but merchants seem to encounter the same issues when setting up their affiliate program on their own. Whenever we (AM Navigator) get a new client (with an affiliate program) we perform an audit to determine what needs to be fixed in order promote the affiliate program in the proper light and there seems to be the same items most (not all) merchants either neglect or complete partially. This post will cover the top 5 items merchants on the ShareASale affiliate network neglect to include or complete partially when setting up their affiliate program.

#1 – Program Agreement (AKA Terms of Serivce)

This document is probably the most important as it is the “rules” by which affiliates need to follow. Important points to include are:

  • PPC (Pay-Per-Click) guidelines – Be specific on what words are off limits and what words can be used.
  • FTC policy
  • Coupon policy (if applicable)
  • Fraud policy

#2 – Emails sent to affiliates during the sign-up process

This is another piece that many merchants do not capitalize on. The 3 emails affiliates receive from ShareASale on the merchant’s behalf are:

  • Apply Email – This is sent to an affiliate once they apply to join a merchants affiliate program. This should tell the affiliate that their application is being reviewed and they will be contacted within 24 hours with a decision.
  • Decline Email – This is similar to the apply email. It only gets sent to affiliates that merchants reject from their program, but in fairness to the affiliate it should include reasons why they may have been declined and give them an opportunity to contact the program manager and/or re-apply .
  • Approval Email – Merchants get this one wrong the most of the three (3). This email should include information about the program (description of the company and main selling points of the affiliate program), PPC guidelines (like outlined in the program agreement), links for them to use immediately (have the code available for them to simply copy and paste), and contact information for the affiliate manager.

#3 – 88×31 Logo

You may be asking yourself, a logo? The 88×31 button banner is important because it is one of the most popiular sizes affiliates use, but it also provides additional exposure when affiliates are looking for merchants to promote. In the merchant search section affiliates view potential matches and a logo is included with many of them and it helps to “convert” the prospect into an affiliate. A simple logo can be the difference.

#4 – Banners

I have seen merchants have over 50 banners available and then I have seen a few that have 5. There is no “magic number” for banners, but having the most popular sizes available is critical. Merchants need to provide sizes that affiliates can use. I have seen obscure sizes and then the most popular sizes are missing and I scratch my head, but here is a link to the most popular banner sizes.

#5 – Newsletters

Last, but certainly not least, newsletters. A good majority of merchants I have done audits for either send newsletters out infrequently or not at all. The latter is most common. How are merchants supposed to communicate with affiliates? The newsletters should be sent out bi-weekly, but at the very least monthly. They should include any news about the program, coupons/deals, links to creatives, and contact information.

I could have gone on forever, but I gave the top 5 items many merchants either neglect or do halfhearted when setting up their affiliate programs. Every aspect of an affiliate program should be completed fully, no matter how relevant a merchant thinks it is. Affiliate managers jobs are to “WOW” affiliates and get them to promote their products/services and having a fully integrated and set up program is the first impression to all.

How to Send an Affiliate Newsletter Through CJ Affiliate

Communication is one of the keys to success in affiliate marketing (as a merchant). What do I mean by that? Communicating with your affiliates is a vital piece (behind recruiting/activation) to a successful program and letting them know the happenings within your affiliate program is a must for many reasons. Newsletters are the #1 option for communicating with affiliates. For merchants that use CJ Affiliate I will be going step-by-step on how to send a newsletter through the CJ Affiliate interface.

Step 1 – How to Get Started

Once logged in to your CJ Affiliate merchant interface you will want to click the “Mail” tab. A drop-down box will appear and then click the “Email Campaigns” tab. You will then be directed to the page that will guide you through the rest of the set-up and sending process.

CJ 1 CJ 2

Step 2 – Create New Email Campaign

This step is where you can see any old newsletters that were sent, along with the statistics of them. This is useful for gauging the open rates by your affiliates. For the purpose of this post we are going to click the “Create New Campaign”.

CJ 3

Step 3 – Input General Information

You want to name the campaign (something relevant to the content), plus add the name of the email, but most importantly you want to select the audience to target. Select joined and the next step will get into specifics of what groups and affiliates you can target with your newsletter.

CJ 4

Step 4 – Select Targeting Options

You can select all joined, a specific group of affiliates (only if you have them broken into groups), active affiliates, their network ranking, and their country.

CJ 5

Step 5 – Compose the Affiliate Newsletter

You have the option to create an HTML to text version of the newsletter, but I recommend an HTML version. Here you will create the newsletter subject, who the newsletter is from, and select the reply-to address (make sure it is an inbox that is monitored closely), and paste the HTML into the rectangle box.  CJ Affiliate also provides you the ability to add quick links to the newsletter by simply clicking on them in the box next to the HTML message.

CJ 6

Step 6 – Send a Test Email

Insert the email address you want the test to go to and hit “Send Test”. Make sure to review the newsletter carefully for any spelling, grammar, or formatting errors. Once the test has been review hit the “next” button.

CJ 7

Step 7 – Send Newsletter

The final step is where you review the important details of the newsletter. Ensure the information provided is correct. The last thing to do is hit the “send” button.

CJ 8

CJ affiliate has made it rather easy to send a newsletter to your affiliates. Make sure to communicate any important changes or special deals to your affiliates as they happen. The affiliates need to know what is going on in the program to effectively promote it and to make money for them and you.


How to Monitor Branded Keywords in ShareASale

A merchants brand and how it is perceived to consumers is paramount. Ensuring the brand is being promoted in a positive light is as important as anything else a company can do; but how do merchants with affiliate programs monitor their brand and its use? Sadly, many merchants do not monitor affiliate activity in terms of brand bidding and it costs them money (sometimes significant amounts).

The merchants that do not monitor their affiliates promotional methods sometimes end up paying commissions that should not be paid. When affiliates bid on merchants branded terms in PPC (Pay-Per-Click) campaigns they may be intruding on the merchants own efforts and ultimately driving up the cost of the campaigns. You may ask, why would merchants not monitor this activity? It comes down to education. The merchants may not know enough about it and in turn do not have the tools to combat it. The tools used to detect this activity may not be in the budget or in some cases the merchant does not care, but ShareASale has two (2) tools to help merchants monitor their branded keywords and how they are being used by affiliates. Here are the two tools provided by ShareASale:

Step #1 – Set Up Branded Keyword Monitoring and Rules

SaS 1

Under the “Tools” tab click “Monitor Search Keywords”.

Step #2 – Add Keywords for ShareASale to Monitor

SaS2

This is where merchants will add keywords that ShareASale will monitor. They can add up to five (5) for them to monitor. Put the most important (or popular) branded keywords in and ShareASale will send alerts if violations occur.

ScreenHunter_676 Jan. 28 09.52

Step #3 – Set up Keyword Bidding Rules

SaS3

Now we are getting to the nitty gritty. This step is where merchants provide rules that affiliates must obey when using PPC campaigns. Merchants can add a rule that affiliates cannot use PPC bidding at all, but if allowed to, then specific rules can be set. Adding keywords that are off limits to affiliates will be compiled to a list that will be available to all affiliates upon signing up for the program. Completing this section will tell the affiliates from the beginning the stance on PPC bidding.

Merchants should protect their brands by all means necessary. There are affiliates that abuse the PPC rules, but ShareASale has a nice tool to help monitor violations, but recommended to compliment this is signing up for a brand monitoring software (i.e BrandVerity). Merchants do not want to lose control of their brands, especially when there are ways to prevent it.

Creating Coupons & Deals in Your ShareASale Affiliate Program

Coupons and deals can be an important part to a successful affiliate program, but please understand not every merchant needs them in order to have a successful program. Depending on the particular vertical you are in coupons may be essential to keep up with the competition, while other verticals coupons may not help sell products (i.e. some B2B products). I will be going over step-by-step how to create and add them to your ShareASale program.

Step 1 – Navigate to the “Post Coupons and Deals” Page

SaS1

Once logged into your ShareASale merchant account you will click on the “My Creatives” tab then “Post Coupons and Deals”. Once that happens you will be directed to a page to start creating your coupons/deals.

Step 2 – Start Adding the Details of the Coupons/Deals

Now you will start adding the details of the coupon. There must be a start date, end date, title (explains what the coupon/deal is – 10% Off), coupon code (if applicable), a URL where the deal can be found on your site, a description, any restrictions (i.e. cannot be combined with any other offer, etc.), keywords (so that affiliates can search the entire ShareASale database), and who the coupon/deal is available to (is it public to all or only select affiliates).  It is a very simple process, but make sure to fill in as much as possible so that the affiliates have everything they need to promote the coupon.

SaS2

SaS3

SaS4

Step 3 – Check the Coupon Was Added

Once the coupon has been created you will want to make sure it populated in ShareASale and everything is correct. You will need to click on “See Current Deals” and then all the current deals will be available to view. In this section you also have the ability to edit a deal.

SaS5

There you have it, creating coupons/deals in ShareASale is as easy as it sounds. The key is to make sure all information is accurate (especially end dates) and once the coupons/deals are created be sure to announce them to your affiliate base via a newsletter. If you need help creating an affiliate newsletter read my post “How to Create and Send ShareASale Affiliate Newsletters”.

How to Use the ShareASale’s “Group Affiliates” Tool

Your affiliate recruitment efforts are yielding fruit and your program is doing well, but you are having trouble managing your growing affiliate list. What do you do? As an affiliate manager you may want to send a specific group of affiliates a message, but do not want to include all your affiliates, or you want to try and activate your stagnant affiliates, but are not sure how to do this. In this post I am going to show you how to group your affiliates using the tool in ShareASale (next post will cover CJ Affiliate). This step-by-step guide will make it easy for you to group your affiliates however you want.

Step # 1 – Navigate to “Group Affiliates”

Once you have logged in to your ShareASale merchant account you will go to the “Affiliates” tab and then click the “Group Affiliates” sub tab. This will take you to the screen where you can start creating, modifying, and even deleting existing groups (if you have any, of course).

Step # 2 – View, Create, or Delete Groups

Once on the affiliate groups page you will see first the option to view any current groups created. To view any group, hit the drop down arrow and select the group and hit “view”.  The next section is creating a new group. Here you will name the group (i.e. Sales in last 30 days, No sales ever, Coupon Affiliates, etc.), then briefly describe the group. Next you are going to select the commission rate for each group (per sale and/or per lead). You may want to pay certain groups a different commission, so this is the place to implement that. Every time you add an affiliate to a group they will be paid the commission for that group.

SaS 1

Step # 3 – Adding Affiliate to Groups

Now that the groups are now created and ready to be utilized, you have to add affiliates to them. You will go to the “Affiliates” tab and then click “Your Affiliate List”. This will bring you to your list of affiliates (starting from top performers and working backwards). Under the affiliates information you will see a drop down box titled “Affiliate Group”, select the appropriate group and then there will be a pop up to “save all”. Click “save all” and then that affiliate will be included in that group.

Grouping affiliates is a great way to manage the hundreds (even thousands) of affiliates that may be in your program. As I mentioned earlier, grouping affiliates may be necessary for a variety of reasons. It could be you want to send a certain deal to a certain group of top performers or you want to get your inactive affiliates active and referring traffic. Whatever it may be, grouping them and messaging them accordingly will help keep your program organized and save you a great deal of time in the long run.