On November 21st I wrote a post on setting up an affiliate program on ShareASale, now today I am going to walk you through setting up an affiliate program on CJ Affiliate By Conversant. Over my time managing affiliate programs I have seen the set-up process not complete or the merchant decided to shortcut the process. The set-up process should be done with careful precision to ensure you are presenting your affiliate program in the best possible light upon launch. The following guide will go step–by-step in setting up your CJ affiliate program. In total there are seven (7) steps that you must follow.
Step 1 – Technical/Tracking Implementation
Once the contract is signed it’s time to start getting your site ready to handle the affiliate traffic and sales. CJ will send you a tracking integration questionnaire to complete and once complete they will create and send you all the conversion tags needed for your site.
The next step in the technical/tracking implementation process is to install the conversion tags provided. You will need to tag all pages of your site and all conversion pages. Once tracking implementation is complete then you must test to ensure everything is working properly.
Testing the tacking pixel involves 4 test purchases:
- Test # 1 is without a discount
- Test # 2 is with a discount (both whole order and item level)
- Test # 3 is with discount (whole order)
- Test # 4 is with a discount (item level)
Once all four tests have been complete next step is to confirm tests worked, cookie information and site tagging are functional. Now you can move on to completing the program settings.
Step 2 – Program Settings
There are six pieces that need to be complete and they include:
- Upload a logo (150×40)
- Set up publisher accept/decline criteria
This is where you determine how you are going to manage affiliates that apply to your program. I recommend not auto-approving any affiliate, but manually reviewing each application. You can also add specific countries to the auto-decline and manually approve lists.
Add keywords related to your brand. This is what affiliates use to find programs to partner with
- State Serviceable/Shipping Areas
Where do you ship your products to? What countries do you currently service?
CJ has a plethora of categories to choose, but make sure it is relevant to your business
- Draft and upload Program Description
This should describe your company and the products/service being offered, the commission being offered, and any other details that affiliates will need to know prior to joining.
Step 3 – Branded Sign up Settings
This phase of the process involves three (3) aspects:
This should be crafted in a similar way to your program description
This should be a short message to affiliates once they apply to inform them that their application is under review and a decision will be made shortly on their status.
- Header graphic should be added: Size should be 468×60
Step 4 – Program Terms
This is where you determine your program policies and search guidelines. This is important because the information loaded will tell affiliates the “rules” they must play by. Also included here is the commission to be paid out, cookie life, and any other terms that affiliate partners should be aware of.
Creating customized program terms is also an option here. For example, if you partner with an affiliate that you are going to pay a different commission rate to they must be on their own program terms and not included in the “default” terms.
Step 5 – Add New Links
This step is where you upload all your freshly created banners and text links. Use the “links” tab to upload banners and text links.
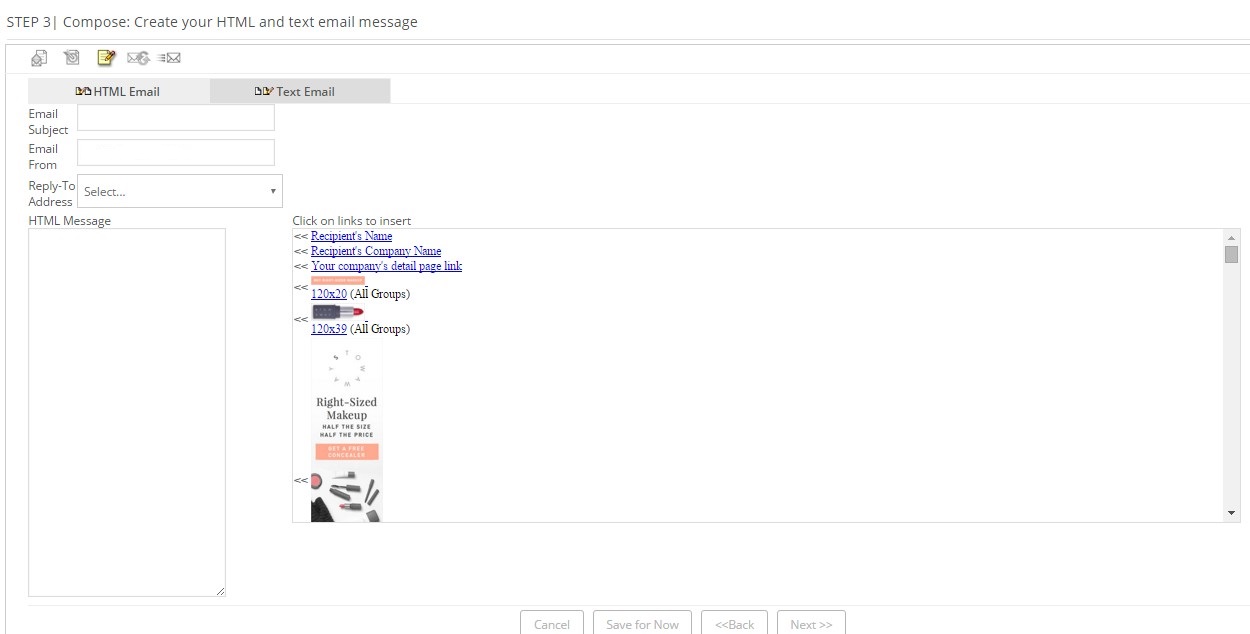
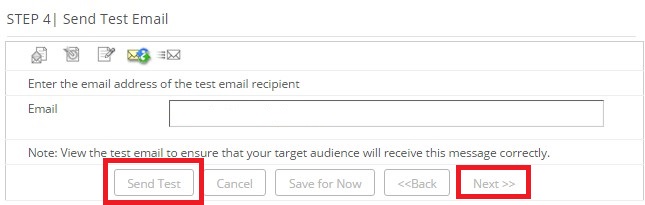
Step 6 – New Publisher Email
This is where you create the email that is sent to affiliates upon acceptance. It should include information on your company, products/services, paid search guidelines, links to creatives to get them started with, and most important, contact information.
Step 7 – Request Activation
Once the six steps above have been complete you can request your affiliate program to live.
You go to: Support Center>The Basics / Getting Started
Whether you are launching an affiliate program on ShareASale or CJ, there are steps that need to be carefully completed in order to successfully launch. Follow the above seven steps and you will have an affiliate program you can be proud of on CJ Affiliate By Conversant.
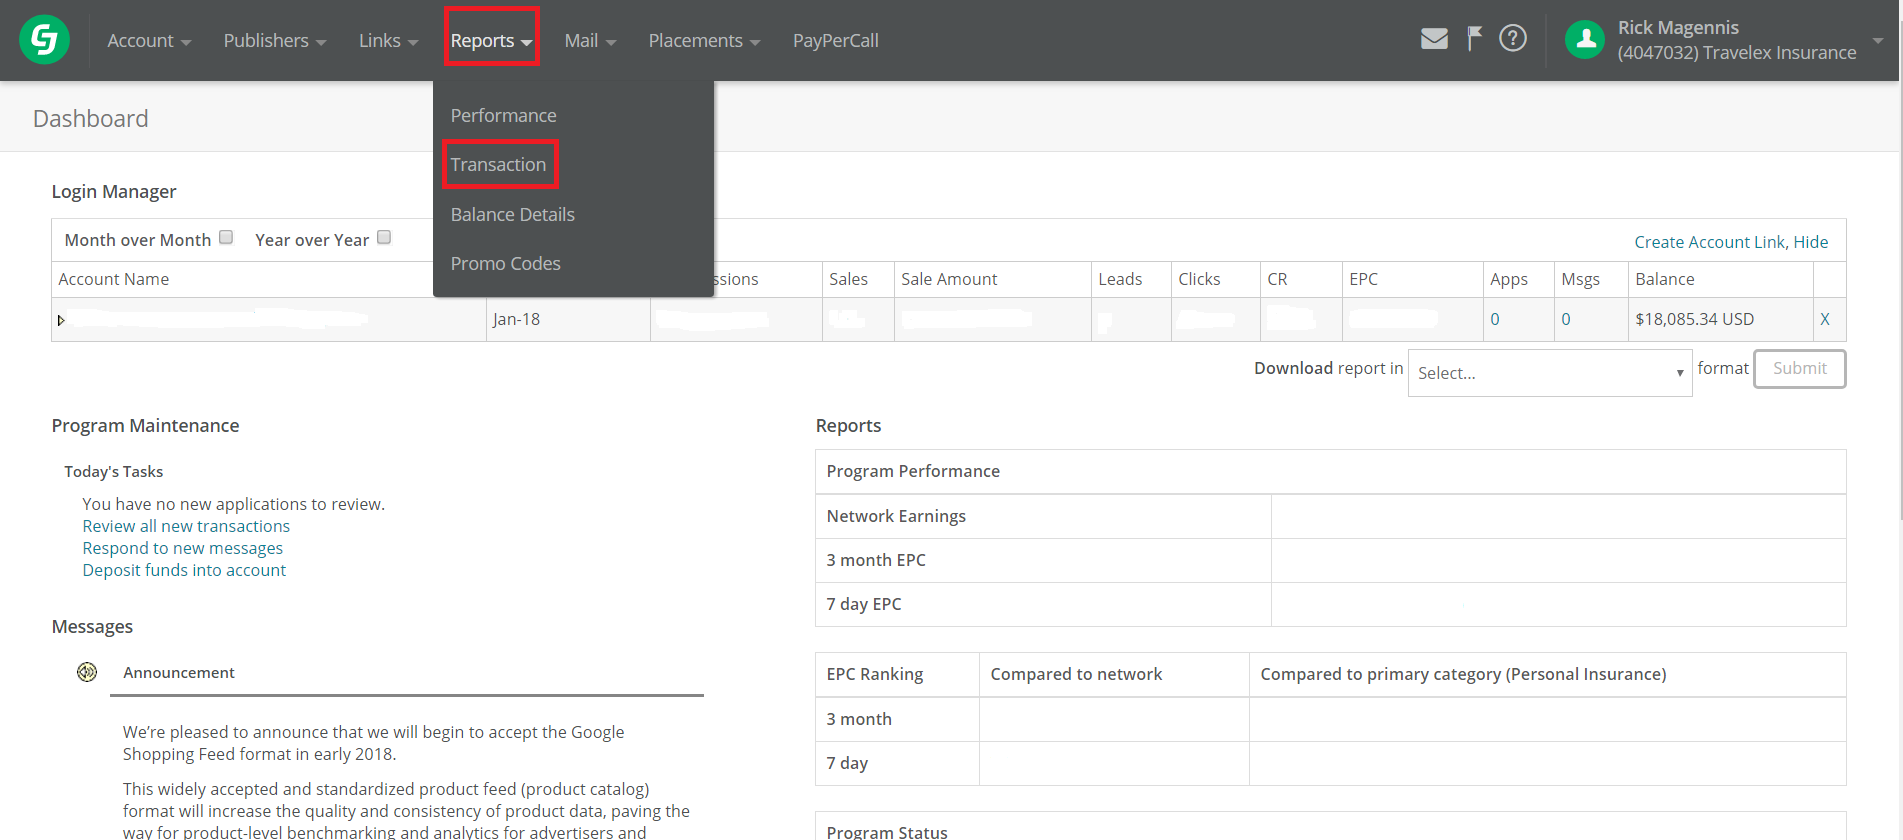 Once logged in to the CJ Affiliate dashboard, click “Reports”, then “Transaction” from the drop-down menu. This will take you to the page where each individual transaction can be viewed from the current (or any previous) month.
 A search can be done either using an order ID, Commission ID, or Transaction ID. In this example, the Order ID will be used. Enter the Order ID in the field named “Enter ID”, then hit the magnifying glass. Scroll down and the Order in question is now available to view along with all of the pertinent details.
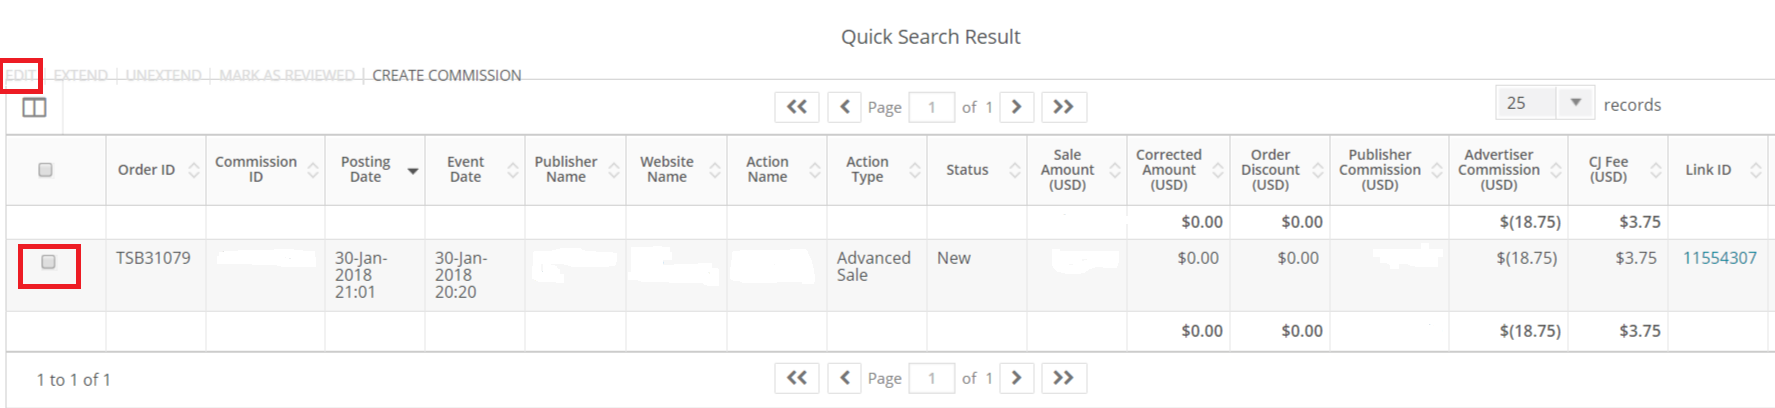 To begin the voiding process, put a tick mark in the box and then hit “edit”. By doing that it will initiate a pop-up to formally void the transaction.
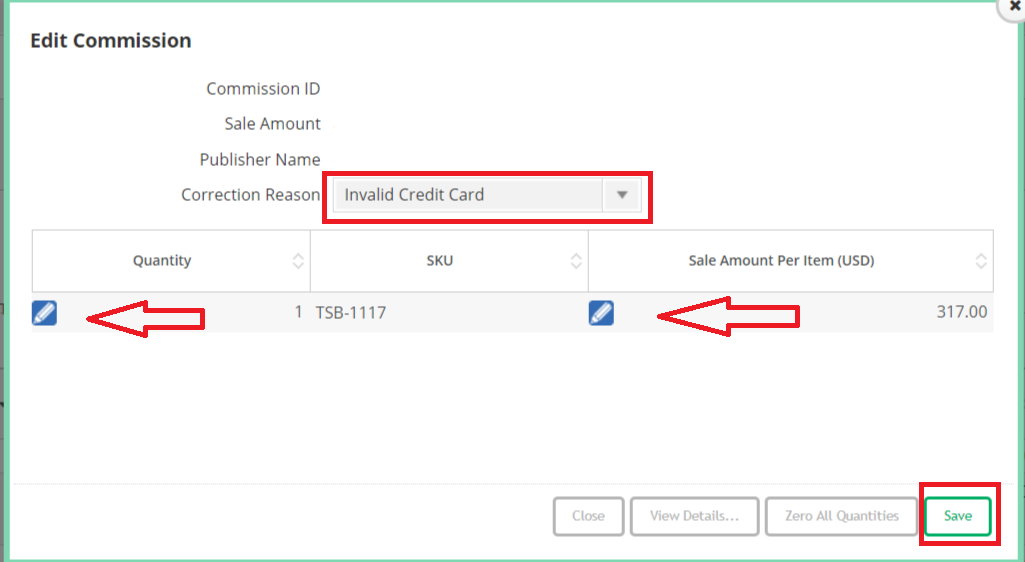 At this stage, the sale amount and publisher’s name will be visible. Select a “Correction Reason” from the drop-down menu. The choices include: invalid credit card, returned merchandise, duplicate order, can’t ship/sold out, and other. Select the reason that best matches. To void the transaction, click the blue pencil box and change the quantity to “0” and do the same for the sale amount, change it to “0.00”. Click save and the transaction is now voided.