7 ShareASale Featured Program Options for Merchants

Are you a ShareASale merchant looking to acquire new and quality affiliates into your program? If yes (and I hope so), then I have some exciting information to share with you. ShareASale offers their merchant’s ways to “boost” their programs exposure and be directly in front of affiliates that can help grow their programs. There are seven (7) options that can increase the exposure of an affiliate program. In the following paragraphs I will detail each one to help determine if it makes sense for merchants to undertake and invest further into their affiliate programs.

Option # 1

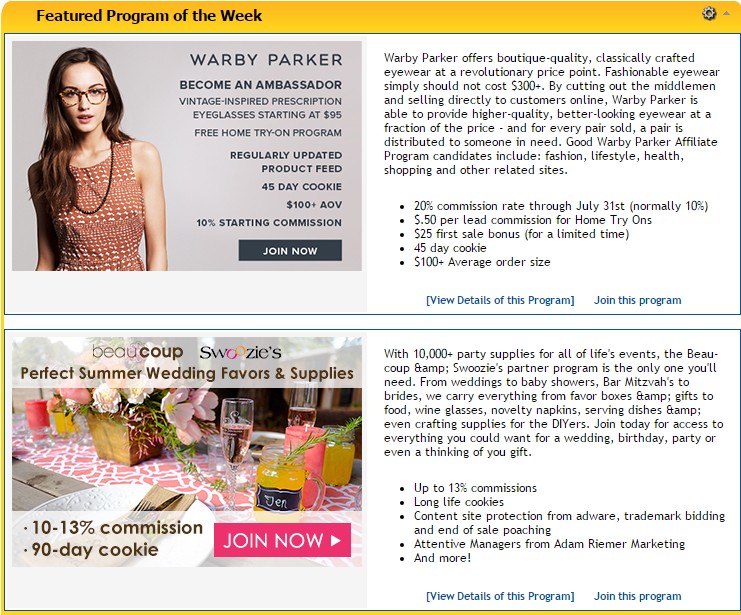
The first placement option (and most popular) is the Featured Program of the Week. A merchant will get their logo and a description of their affiliate program displayed on the opening of the affiliate homepage. This is a competitive placement because there are only 2 merchants per week allowed to be placed. The current cost is $450 per week. Below is a screenshot of what the Featured Program of the Week looks like.

ScreenHunter_545 Jul. 09 10.30

Option # 2

The next option is the Featured Program of Your Category. It is similar to the Featured Program of the Week (includes logo and description) except the placement will be within your category only. This placement is a one (1) month deal and at the time of this post it costs $300. For example, if a merchant is in the Art/Music/Photography category it will be placed at the top of the search results for that category only.
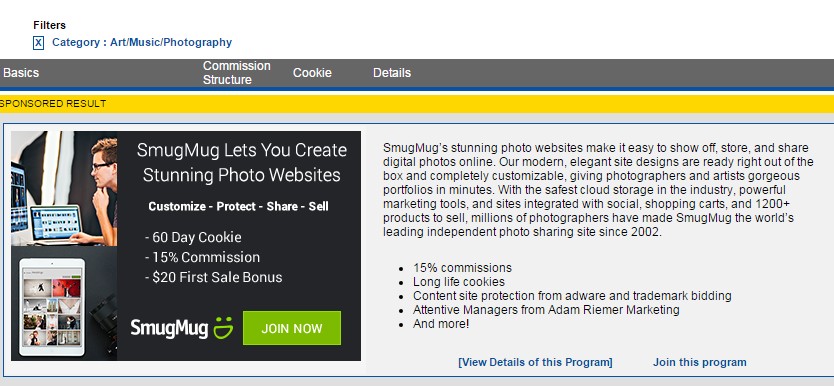
ScreenHunter_547 Jul. 09 10.37

Option # 3

The third placement option is the New Programs in the last 20 days. This is one of the most popular places for affiliates to look for new merchants to promote. It is a “directory” of all the merchants that have launched on the ShareASale network in the last 20 days. This allows merchants to list their ad at the top of the new program category and increase exposure for a new and growing program. This (presently) is a $400 per month placement and the affiliate program must be “new”.

Option # 4

Option # 4 is for merchants who have data feeds. Not all merchants have data feeds, but the ones that do should seriously look at this as an option to increase their programs exposure. The merchant’s graphic will be placed in a rotation along with five (5) others. ShareASale recommends mentioning the data feed within the graphic to enhance visibility. This will cost merchants $550 per month.
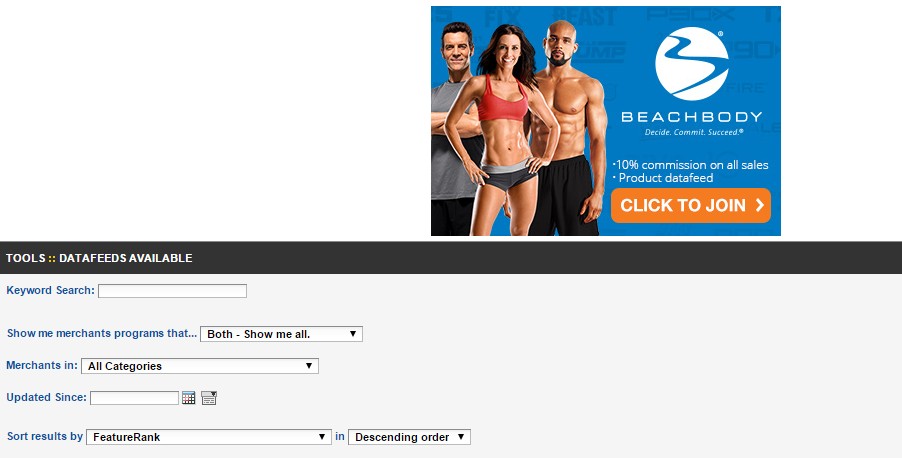
ScreenHunter_550 Jul. 09 10.49

Option # 5

Program Directory Listing is another solid option for merchants to consider. For $650 per month a merchant’s graphic will be listed along with 5 others on the directory page that lists all merchants in the ShareASale network.

Option # 6

Not satisfied with only one (1) category listing? Some merchants operate and can be categorized in more than one category, so ShareASale gives merchants the option to be place in another related category. For $350 per additional category a merchant can be added to additional categories.

Option # 7

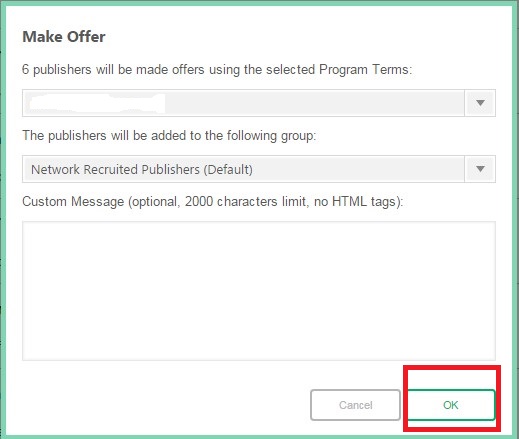
The final option for merchants to expand their programs reach is through Affiliate Invitations. For $200 per two weeks ShareASale will send top performing affiliates in a category invitations to join the merchant’s program.

There are seven (7) viable options for merchants to increase their affiliate programs exposure to prospective affiliates. Not all options will be suitable for all merchants, but there are a two specifically (Featured Program of the Week and Featured Program of Your Category) that can significantly increase a merchants pool of quality affiliates and drive growth for the future of the affiliate program.

Meaning of Postback: Affiliate Marketing Program Context

When setting up an affiliate program, one of the key decisions an advertiser/merchant has to make is what tracking method to use.

Most present-day affiliate programs rely on a pixel embedded into the confirmation/”thank you” page. This (somewhat of an industry default method) is meant to close the loop between the initial end user click on an affiliate link and the end user’s reaching the thank-you-for-your-business page. The affiliate commission is then triggered by (and credited upon) the pixel firing at the moment the customer reaches their confirmation page.

Postback tracking, on the other hand, represents a slightly more technically sophisticated of a method of crediting affiliates for the business they refer. Its essence is grounded in server-to-server posting, whereby instead of relying on the pixel firing, the conversion record (and consequential affiliate commission crediting) is triggered by the advertiser’s server passing the necessary data to the affiliate program’s platform’s server.

Server-to-server affiliate postback

Let me give you a real-life example. We have a client who employs two affiliate payment models within the same affiliate program: PPL (pay-per-lead) and PPS (pay-per-sale). The affiliate program is run on an affiliate network which supports both pixel-based tracking, and postback tracking. The advertiser in question is paying affiliates $X per lead when a referred user signs up for a free account, and (on top of the PPL amount) Y% of the sale amount, should the lead convert into a paying customer. For the PPL part this affiliate program relies on pixel firing on the confirmation page, whereas the PPS payout is posted (to the affiliate network’s server) by the advertiser once/if the sale occurs.

While implementation of postback requires a higher level of technical expertise (than the simpler-to-integrate pixel-based tracking), it’s a method that is widely supported by affiliate platforms of all types: including all types of affiliate networks and affiliate software for in-house-based affiliate tracking/programs.

How to Recruit Affiliates in CJ Affiliate Network

In a previous post titled, “How to Find Affiliates to Recruit into Affiliate Program”, I showed you where you can go to find affiliates for your affiliate programs and today I am going to show you how to use CJ Affiliate (if you are a merchant on their network) to recruit affiliates into your program. Using CJ Affiliate’s network recruiting tool should not replace active outreach to prospective affiliates, but can be a nice compliment to your overall recruiting efforts. Here is a step-by-step guide to recruit affiliates in CJ Affiliate.

Step 1 – Navigate to the “Manage Publishers” Tab

Once you are logged into your CJ Affiliate account you will need to navigate to “Manage Publishers” tab.CJ 1

Step 2 – Go to Publisher Recruitment Tab

Once on the “Manage Publishers” page you will then have to navigate to the “Publisher Recruitment (beta)” sub tab.

CJ 2

Step 3 – Start Recruiting Affiliates

This is where it gets fun! You have an array of options to use in recruiting potential affiliates to your program. You can use the “keyword” function as well publishers by category, country, network earnings, geographic source, and publisher classification. Regardless of the option you use to filter out prospective affiliates you will have to “check” the box to the left of the publisher’s name. By checking the box you are going to be sending them an invitation to join your affiliate program. Once you have selected the affiliates you want to invite to join your program you will have to hit the “Make Offer” button.

CJ 3

Step 4 – Confirm Your Offer(s) to Affiliates

Once the “Make Offer” button is hit, a pop-up will appear and you will have to confirm the offers to the affiliates. If you are satisfied you will then click “Ok”, but if you want to modify anything simply hit cancel and you can go back and make any necessary changes.

CJ 4

Step 5 – Accompany Offer Push with Email  Invite

When asked how they “prefer to be contacted by affiliate managers” (as part of Affiliate Summit’s 2014 AffStat Report questionnaire), nearly 82% of affiliates respond: email.

2014 AffStat Report

While most affiliate managers in charge of CJ-based affiliate programs quit the process at Step 4, we at AM Navigator encourage you to go further and reach out to the affiliates who now have a pending offer (from you) to review. Accompanying your offer push(es) with email outreach dramatically maximizes the effectiveness of this affiliate recruitment method.

As I mentioned at the beginning of this post, you should not use this as your only recruitment activity. This is a compliment to your other activities geared at onboarding new affiliates. The positive aspect of using CJ to recruit affiliates is that they are already a member of the network and it will take a simple click on their end to accept your offer. We actively use this tool when managing clients programs and it has been a very successful initiative.

How to Give an Affiliate a Bonus Using ShareASale

A few weeks ago I wrote a post that showed advertisers that operate their affiliate program on CJ Affiliate how to provide their affiliates a bonus. In today’s post I am going to show merchants how to manually bonus their affiliates that operate on the ShareASale affiliate network. I will provide a step – by – step guide to follow during the process.

Step 1 – Log in to Merchant Account and Click “Affiliate List” under the tab of “Affiliates”

After logging into your ShareASale merchant account you want to hover over the “Affiliates” tab in the main navigation and click “Affiliate List.” The affiliate list will show you all your current affiliates in order of performance to date. The top performers will be at the top of the list.SaS 1

Step 2 – Locate Affiliate You Want to Bonus

Once you are in your affiliate list scroll down the list until you locate the one to manual bonus. Once located click the “Details” link under their name. It will take you to their individual affiliate page where the bonus activity will take place.

SaS 2

Step 3 – Submit the Bonus

Once you are on the affiliates ShareASale page you will need to scroll down until you get to the section titled “Affiliate Actions”. From there you will put the desired bonus amount and the type of transaction. You will fill in the field “Specific Amount to Give Affiliate” (i.e. the dollar amount) and change the drop down box to “Bonus”. Once complete you must hit “Submit Transaction” for it to be complete.

Please note: Even though it is not a sale/lead tracked through ShareASale there will still be a 20% fee charged to you for the manual bonus transaction.

SaS 3

Using the manual bonus feature in ShareASale is straight forward process and necessary for rewarding performance, paying for placements with affiliates, and even correcting transactions (I will dive into this next week).

How to Give an Affiliate a “Bonus” in CJ Affiliate

Affiliate marketing is simple to understand, when an affiliate (or sometimes called a publisher) refers a sale to a merchant they receive a commission. The payment can be in the form of a percentage of the sale or a flat dollar amount. There are occasions when affiliates will get paid a “bonus”. The reasons an affiliate may receive a bonus include: being a top performer and the merchant is showing their appreciation, hitting a specific goal outlined by the merchant, paying for placements on affiliates sites, or for some reason their sales not getting tracked and the merchant is manually crediting them their earned commissions.  With that being said I will show you how to manually credit a bonus to an affiliate within CJ Affiliate.

Step 1 – Click the “Reports” Tab

Once you log in to you CJ Affiliate merchant account you will want to click the “Reports” tab.

CJ 1

Step 2 – Navigate to the “Transaction” tab under the Main Navigation

Here you can review program performance, affiliate performance, promo codes, but we are going to focus on the “Transaction” tab. Once you click on the “Transaction” tab you will be directed to a screen where you can review all transactions that have taken place over the life of the affiliate program.

CJ 2

Step 3 – Click “Create Commission”

After clicking on the “Transaction” tab you need to scroll all the way to the bottom and click the “Create Commission” button. This is where you will officially pay the bonus to the affiliate. Once the button is clicked a pop-up will appear and will need to be filled out.

CJ 3

Step 4 – Pay the Bonus

You want to make sure the “Action Name” drop down box is filled in with “Bonus”.  When filling the “Website ID” make sure you are using the affiliates PID and not CID. If you use a CID it will not work. After entering the “Website ID” enter an order number, it can be an internal one or one specifically for CJ, but it is required. Once that is complete you need to fill in the exact amount you are going to “Bonus” the affiliate. Once all four sections are complete, hit “SAVE”. You will then get a message saying the transaction was successful.

CJ 4

This action is not used on a daily basis, but should be understood. It is important for affiliate managers to know how to maneuver the network and credit affiliates when necessary. As I mentioned above there are various reasons this action can/should be used, but knowing how and why to use it is equally as important.

A Step-by-Step Guide to Recruit Publishers in CJ Affiliate

Recruiting quality affiliates can be a challenging and time consuming task, so CJ Affiliate has offered their merchants a way to recruit affiliates through their interface. All of the affiliates with accounts in CJ Affiliate can be sent an offer through this function and you, as the merchant, can choose what affiliates you want to partner with. They offer a robust filtering system to narrow your search down to the group of affiliates you want to target. Let me show you step-by-step how to recruit CJ affiliates.

Step 1 – Go to “Manage Publishers” Tab

Once you log in to your merchant account, navigate to the “Manage Publishers” tab and click.CJ 1

Step 2 – Go to “Publisher Recruitment (beta) Tab

After clicking the “Manage Publishers” tab click the “Publisher Recruitment (beta)” tab, which is directly underneath the main navigation.

CJ 2

Step 3 – Filter Prospective Affiliate by Categories

Searching for affiliates can be done by entering keywords, category, country, network earnings, geographic source, and publisher classification. If you are targeting affiliates in a specific category you can choose that, whatever it may be (i.e. Consumer electronics, Health, Home & Garden, etc). If you want to only recruit affiliates in the United States you have that capability as well. You, as the merchant, have numerous way to filter and recruit affiliates so you can grow your program.

CJ 3

Step 4 – Choose Affiliates to Work With

Once you have filtered out the affiliates based on categories selected it is now time to send them an offer. The offer can be the default offer or a customized offer for them or other targeted affiliates. You will see the list of prospective affiliates to the right. It will list their ID, URL, network earnings and their classification. If you want to partner with an affiliate listed just check the box to the left of their name (do this for all the affiliates listed) and click the “Make Offer” button.

CJ 4

Step 5 – Make Offer Official

Once you clicked “Make Offer” a pop-up will appear for you to choose the program terms you want to send to the affiliate. If you have more than one program term, then hit the arrow for the drop down box to choose the one to offer them. You can also add them to a group if you want (optional). Once the offer has been selected, hit “OK”. The offer will be sent to the affiliate(s) for them to approve. Please be aware that affiliates may decline the offer you send them, so if they are high on your target list reach out to them personally to see what it will take to work together. After sending the offer we (AM Navigator) highly recommend reaching out to the affiliate(s) individually with an email explaining the offer and links to apply to the program.

CJ 5

Using CJ Affiliate to recruit affiliates can be a time saving task, but it should not replace actively looking for affiliates though other sources like: Google, social media, and current customers. Active affiliate recruitment is an integral part of affiliate program management and should be done weekly and follow a strict schedule of follow-ups.

How to View Affiliate Banner Performance in ShareASale

As a merchant you are always looking for ways to improve the performance of your affiliate program and monitoring reports and trends are essential.  What reports should you be reviewing to ensure optimal performance? The transaction report, weekly report, affiliate timespan report, and banner performance report are among the most popular reports (in ShareASale). Today, I will be providing a step-by-step guide to review the banner performance report in ShareASale. This report tells you (the merchant) what banners/links/deals are most popular among your affiliates. So without any further ado I will begin.

Step # 1 – Click the “Banner Performance” icon under the “REPORTS” tab

The banner performance report is under the “Reports” tab along with the other reports important for managing your program. Once you click the “Banner Performance” icon you will be taken to the next screen where you can filter your data in many ways.

SaS 1

Step # 2 – Select your data segments

This step is where you select what data to include in the report. You want to select a date range to analyze first. ShareASale only allows you to review a 30-day period at once. You also have the option to segment it by creative types (banners, links or deals) and by commissions paid, sales generated, and number of clicks. To view the data within the ShareASale interface, click the “Refresh Report” button and you will be provided the data you requested via the filters used. Lastly, to create a downloadable text version make sure to “check” the box labeled so. To open the document in excel please read this article How to View ShareASale Pipe-Delimited File in Excel Columns

SaS 2

Step # 3 – Review banner/link data

You will see the banner/link ID’s are on the far left side of the page and then you have the banner type, the amount of clicks (unique) it received, the commission earned, the total sales generated, number of sales, and voids.  You may not know exactly what link is what, so you have to preview it and determine if it was a banner, text link, coupon, etc.

SaS 3

Step # 4 – Preview banners/links

To preview the banner/link in question click the square icon next to the banner ID. A pop-up will appear on your screen (similar to the one below) and it will tell you if it is a banner or a text link and any other details you may need to know including a preview of the banner and text link. For the purposes of this post I removed sensitive client information, but the idea and logic is the same.

SaS 4

Understanding how your creatives are performing is important because it will help you determine if you need more of a particular banner and it also lets you know what type of creative your affiliates prefer so that you can offer them what they will use. Creating banners and text link without knowing if they will be used is a waste of time and resources, so be sure to review the “banner performance” report on a monthly basis.

How to Create Affiliate Commission Rules on ShareASale

Do you want your affiliate program to stand out to potential affiliates? Of course you do, so how can it be done? Some programs sell themselves either because they are a recognizable brand, their website converts well, or they offer incentives to their affiliates for hitting specific milestones. Rewarding your affiliates is a key to success, because if they are happy they will continue promoting your program and some may put more effort in. I am going to show you how to set up commission rules in ShareASale so that when affiliates hit certain milestones set up by you they will get a bonus automatically credited to their accounts. You can do this manually, but ShareASale has a great feature that automates the entire process. Here is a step-by-step guide to setting up personalized commission rules in the merchant interface of ShareASale.

Step 1 –  Go to the “Edit Settings” tab under the “My Account” tab

Once you are logged in the merchant interface of ShareASale you need to navigate to the “Edit Settings” section under the “My Account” tab.

SaS 1

Step 2 – Click “Manage Advanced Commission Structures”

Once in the “Edit Settings” section you will need to locate the “Manage Advanced Commission Structure” link and click it. You will be taken to a new page where you will begin the setup process of your incentive campaigns.

SaS 2

Step 3 – Decide which incentives you will be enabling

There are a variety of incentives to offer affiliates, some of them include: a first sale bonus, double commission on sales for the first 30 days, a bonus for referring a predefined amount of sales in the first 30 days of being an affiliate, and so on. Be sure to choose ones that will encourage activity immediately upon joining and also make financial sense to you. In the affiliate programs I manage I like to offer all new affiliates a first sale bonus. It shows them that we care about their performance and that it motivates them even after the first sale. We may offer that affiliate other private incentives down the road if performance continues at a high level.

SaS 3

Step 4 – Setting Up the Commission Rule(s)

For the purpose of this post I will show you how to set up a first sale bonus.

You want to name the rule, so “First Sale Bonus” would be the name.

Next, you want to select the action. Click in the “Commission Action” section and you will be provided a drop-down menu and then select “Bonus a flat amount”.

You will then have to include the amount of the bonus, for this example I put $5.

Once you have the name and action complete you will need to apply conditions to the rule. If it is a first sale bonus you will want to click the “Add Condition” box and click “Performance metric reaches a specific value”, the under “Combined Stats” you will click “number of sales total less than 1 (you will add the 1 manually).

To make things even easier you should tag your affiliates so that setting up the rules become even easier. If you have a brand new program with no sales you will not need to create tags immediately, but if you have an established program generating sales you will need to create tags to make sure only new affiliates are being credited for their first sale.

SaS 4

Creating commission rules will help automate the bonus process. As noted earlier, there are other options in terms of bonuses, so be sure to review the ones available in ShareASale and choose the ones that will motivate your affiliates. Rewarding your affiliates should be a part of the overall program optimization process, but make financial sense to you, the merchant. Happy affiliates are the best kind and they tend to spread the good word about you to their peers.

How to View ShareASale Newsletter Performance Reports

Your affiliate newsletter has been sent to your affiliates, but how to you find out who is opening it? It is important to analyze such things as the open rate, bounce rate, and the individual affiliates that are reading the newsletter. I will provide a step-by-step guide to finding and reading your affiliate newsletter performance reports.

Step 1 – Locate and Click on the “Send Newsletter” Icon

Once logged in you will need to hover over the “Affiliates” tab and click the “Send Newsletter” icon.

Sas 2

Step 2 – Click on the “Full Archive Page” Link

After you click on the “Send Newsletter” icon you will need to scroll down and click the “Full Archive Page” link. The link will take you to a page where it will show you all your previous newsletters sent.

Sas 3

Step 3 – Choose “Report” from Newsletter Archive

This section will show you every single newsletter sent along with other pertinent information including: newsletter ID, the send date, how many affiliate it was sent to, the option to view the newsletter, and report. For the purpose of this post we are going to click on “Report”.

SaS 4

Step 4  – Review Data for Specific Newsletters

Here is the data for each newsletter you chose. The rectangle box at the top will have the entire selection of available newsletters that have performance data. I removed all the sensitive information from the image, but you should see a few choices (if you have sent them in the past).

The information provided below provides exact numbers of opens, the open percentage, bounces, the bounce percentage, and the individual affiliates that opened the newsletter. To find out who the affiliates are that opened it simply click the “plus sign” (red square).

SaS 5

Why are affiliate newsletter open rates and bounce rates important? They help in determining the best method to communicate with affiliates as well as the best times and days. The bounce rate could be a combination of invalid email addresses, mailboxes full, etc. To determine the best day and time to send affiliate newsletters we recommend A/B testing. Send a newsletter out on different days of the week, at different times, with different subject lines. Once you have completed the tests, simply review the data, learning from your successes, and constantly refining how you handle your future mailings.


How To Create and Send ShareASale Affiliate Newsletters

Affiliate newsletters are an important component in managing relationship with your affiliates. Communicating with your affiliates is extremely important to keeping them engaged and active. Newsletters should have a personal touch and provide affiliates with information they can use to further promote your products. In January I wrote a post on writing effective newsletters, but today I am going to show you how to send a newsletter through the ShareASale interface. I will provide a step-by-step guide to this very important, but sometimes overlooked piece.

Step 1 – Locate the “Send Newsletter” Icon

After you log in to your ShareASale merchant account, hover over the “Affiliates” tab and you will see a “Send Newsletter” icon (looks like a stack of newspapers). Click the “Send Newsletter” icon.

Blog Post 1

Step 2 – Choose the Format You Want to Send the Newsletter In

You have three (3) options on how to send the newsletter to your affiliates:

  1. Text
  2. HTML
  3. Split Campaign.

When I send newsletters out for clients I use the HTML option because it allows me to create a robust newsletter with images and clickable links. The split campaign option is available when you want to maximize your open rate.

Blog Post 2

Step 3 – Determine the Recipients of the Newsletter

By default is provides a list of ALL affiliates to send to, but if you do not want to send it to all affiliates ShareASale allows you to search affiliates in many ways including: groups, tags, commissions earned, clicks, country they reside in, or even past newsletter recipients. Once you determine who is getting the newsletter you will see them in the recipients section to the right.

Blog Pst 3

Step 4 – Compose your Newsletter

This is the section where you actually compose your newsletter. For this articles purpose I have chosen the HTML format. You must enter a compelling subject line (you want affiliates to open it) and the body of the newsletter. ShareASale offers ways to customize and personalize newsletter using Macros. You can insert a Macro and have the affiliates name automatically populate when it is sent to them and also include specific creatives that will embed the affiliates ID automatically.

Blog Post 4

Step 5 – Preview your Newsletter

Once the subject line and body of the affiliate newsletter are complete you can preview it and make sure it is formatted the way you want and it is mistake free. In this step you can send a test to yourself to make sure all is good.

Blog Post 5

Step 6 – Finalize the Newsletter and Prepare to Send

This is the final step before the newsletter is sent to your affiliates. To the right you will see a summary that will include any items that need your attention. The ones that require your attention will be in red. Here you will choose a From/Reply-to address and the delivery date and time. You have the option to schedule it, but not for a specific time, only certain times during the day. Please note that Friday’s are not a recommended day to send newsletters.

Blog Post 6

There you have it, a guide to sending an affiliate newsletter through ShareASale. Like many of the other tasks in ShareASale it is straight forward. Next week I will show you how to locate affiliate newsletter open rate information.